|
|
| Author |
Message |
seaco

Joined: 31 Dec 2009
Posts: 729
Location: UK
PS Version: CC
OS: Windows 10
|
 Posted: Mon Jan 10, 2011 4:57 pm Post subject: Posted: Mon Jan 10, 2011 4:57 pm Post subject: |
 |
|
Well spotted Hermit told you I couldn't see it, but some body stop me I'm boring myself here!
| Description: |
|
| Filesize: |
160.36 KB |
| Viewed: |
556 Time(s) |
|
_________________
Lee |
|
|
|
|
 |
zenno
Joined: 08 Jan 2011
Posts: 20
|
| Posted: Tue Jan 11, 2011 2:02 pm Post subject: |
|
|
| thehermit wrote: | | Hi zenno what version of Photoshop do you have? I think from CS2 onwards you have the Vanishing Point under the filter menu, this should give you a fairly decent result with only a bit of minor touching up afterwards. |
It's CS5.
|
|
|
|
|
|
zenno
Joined: 08 Jan 2011
Posts: 20
|
| Posted: Tue Jan 11, 2011 2:03 pm Post subject: |
|
|
Up until now, i always thought that my retouching photoshop talents were a litlle above average, but after seeing what everyone showed me here, i think i still need to study...hard....Starting with that vanishing point Hermit talked about.
|
|
|
|
|
|
zenno
Joined: 08 Jan 2011
Posts: 20
|
| Posted: Tue Jan 11, 2011 2:06 pm Post subject: |
|
|
| seaco wrote: | | Do you mean like this? |
Impressive........Was it all done using "vanishing point" ?
|
|
|
|
|
|
seaco
Joined: 31 Dec 2009
Posts: 729
Location: UK
PS Version: CC
OS: Windows 10
|
| Posted: Tue Jan 11, 2011 3:50 pm Post subject: |
|
|
Hi Zenno
No mate no vanishing point, lasso feather copy/paste transform and clone...
_________________
Lee |
|
|
|
|
|
zenno
Joined: 08 Jan 2011
Posts: 20
|
| Posted: Tue Jan 11, 2011 7:47 pm Post subject: |
|
|
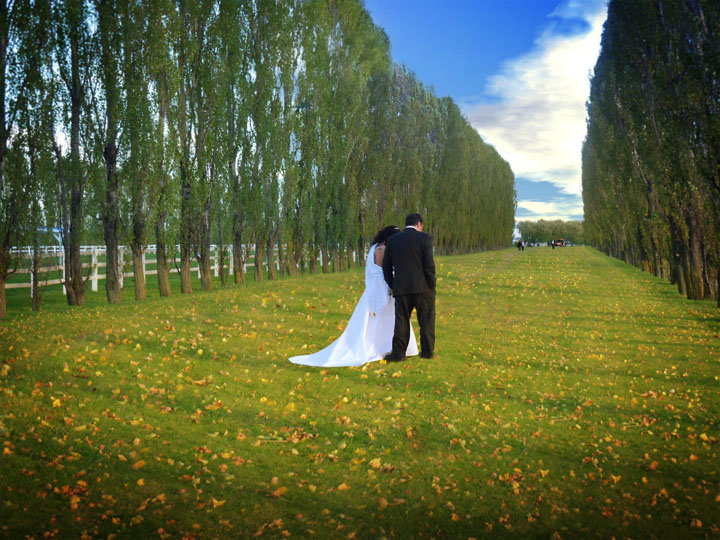
Naaa, it's so uniform, so perfect.....this must have been one hell of a transform tool usage. And what about the sky and the fabulous clouds ? Yo did not make them using those tools.
Obviously your copy/cloning technics are far better than mine.
Just for your info, my main goal is to make this picture completely memorable and people free so i can add later a decent picture of these newly wedded couple from another picture.
At first i wanted to do leaves like the ones you saw but i love your idea better, it's much more natural.
I will try tomorrow to replicate what you did. The longest part will be to do a decent sky. I mean, you even put some blue behind some of the side trees, how in the world have you done that ? There's way too much details in there for me to extract just the sky part from those trees. .....sigh.......
Thanks a lot anyway. I realy appreciate this.
|
|
|
|
|
|
seaco
Joined: 31 Dec 2009
Posts: 729
Location: UK
PS Version: CC
OS: Windows 10
|
| Posted: Wed Jan 12, 2011 10:43 am Post subject: |
|
|
I believe in keeping it as simple as possible to get the effect I need, I left the people in as I wasn't sure if you wanted them (easily removed).
For the leaves I used LASSO chose any area to the right of the couple then COPY/PASTE to a new layer dragged it over the road then hit Ctrl+T to go into Transform if you hold down the Ctrl key you can drag the corners easier to a shape that works, you may have to copy and paste a couple more patches of leaves to fill the whole area ,then you can use the ERASER to reveal the couple!
For the sky I used LASSO and surrounded all the sky including all the light coming through the trees then COPY/PASTE to a new layer, I then used SELECT/COLOR RANGE then chose the sky color hit OK then hit BACKSPACE to remove the sky.
Open a sky pic you want to use and drag it onto the image make sure that layer is behind the one you just made, don't choose to dark a blue in the sky (or simply lighten it) as the edges of the trees will have a light halo on them...
This is so much easier to do than write,
Any problems give us a shout...
_________________
Lee |
|
|
|
|
|
zenno
Joined: 08 Jan 2011
Posts: 20
|
| Posted: Wed Jan 12, 2011 1:32 pm Post subject: |
|
|
Sorry but something came up, i won't be able to have time for photoshop for 2-3 days. $?&?/?"%?$&?
But i promise you i WILL post my results after that short period and i will welcome all comments bad or good.
Thanks.
|
|
|
|
|
|
Patrick
Administrator

Joined: 14 Feb 2003
Posts: 11945
Location: Harbinger, NC, U.S.A.
|
| Posted: Thu Jan 13, 2011 11:54 am Post subject: |
|
|
|
|
|
|
|
|
zenno
Joined: 08 Jan 2011
Posts: 20
|
| Posted: Mon Jan 17, 2011 10:41 am Post subject: Ok, i am back..... ;-) |
|
|
First, let me say that i tried both the grass and the sky.
As i find out, the grass will be easy but will take a long long time to have it perfect just the way i like because it's so much "patching" and it's hard to duplicate the shadow lines on the grass, i mean there's more than one...unless i removed them...hey, what a great idea ;-)
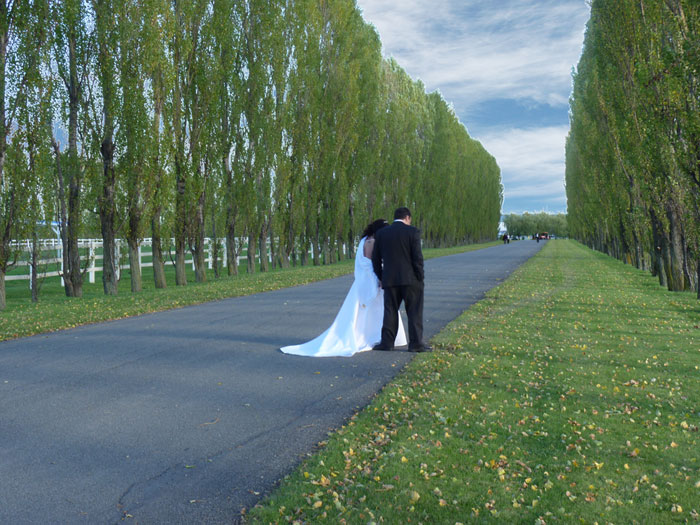
As for the sky, i tried the method you suggested but the result was much less appealing than what you have done.
Look, on picture one, i tried several fuzziness level but that was the best i could come up with. As you suggested, i lightened the sky. Please look at the left for sky part in the trees, yieurk....
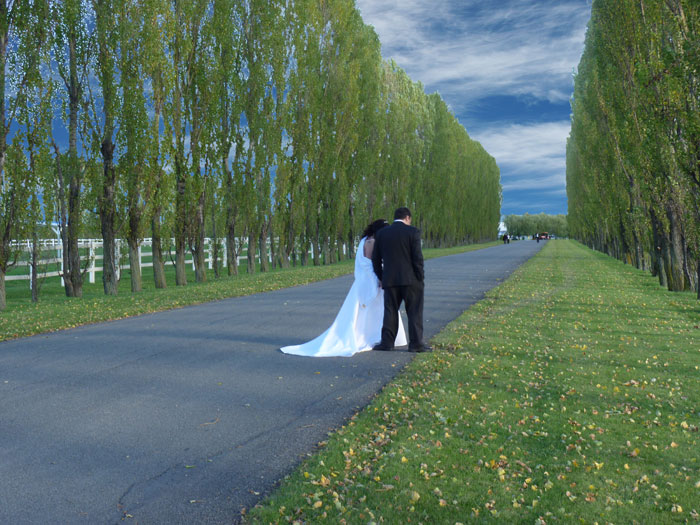
On picture two, i extended the selection (about 4 pixels). I left the sky intact to show the edges that are not so perfect.
How can i efficiently use the color range tool to make more sharper selection. I mean, even with the tutorials i found on the net, it's never perfect like yours.
Thank you.[/img]
| Description: |
|
| Filesize: |
121.89 KB |
| Viewed: |
464 Time(s) |
|
| Description: |
|
| Filesize: |
121.77 KB |
| Viewed: |
464 Time(s) |
|
|
|
|
|
|
|
|


