|
|
| Author |
Message |
Vindeta
Joined: 03 Sep 2010
Posts: 21
|
 Posted: Fri Feb 04, 2011 12:47 am Post subject: separating hair from surrounding area Posted: Fri Feb 04, 2011 12:47 am Post subject: separating hair from surrounding area |
 |
|
Hi everyone,
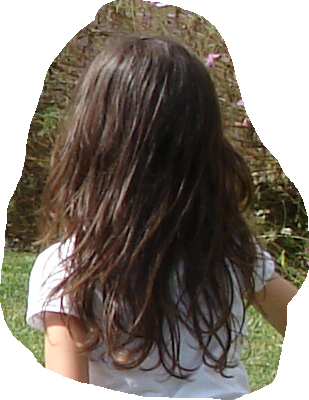
I have been racking my brain and trying endlessly with the tutorials with failed attempt after failed attempt with separating hair from the surrounding objects including the shirt and environment with the added picture.
Ive tried using the different channels with adjusting the levels and curves. It always seems to leave out some of the peices of hair at the edges.
Ive also tried using the pen tool, magic wand, quick selection tool. Nothing seems to work and its truly getting fustraiting.
Some of the tutorials for the channel selection for separating hair are from http://graphicssoft.about.com/od/photoshop/l/blrbps_5agirl.htm and http://www.planetphotoshop.com/select-hair-by-using-channels.html
any suggestions would be truly appreciated as i feel as i am at a complete loss with even separating a channel where the contrast is completly black and white where both are selected when the control+click is hit on that copied channel is hit
| Description: |
|
| Filesize: |
123.38 KB |
| Viewed: |
1259 Time(s) |
|
|
|
|
|
|
 |
Vindeta
Joined: 03 Sep 2010
Posts: 21
|
| Posted: Fri Feb 04, 2011 2:57 am Post subject: |
|
|
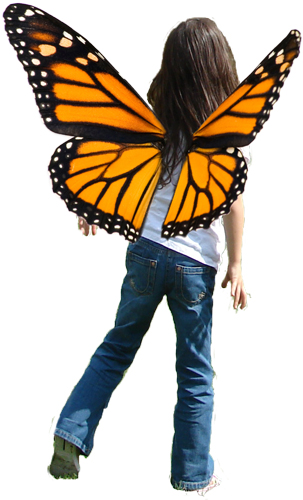
Just to show where im going with this, I am trying to put some of the extracted layer over the layer with the wings in attempt to make the hair look as if its flowing over the wings
Once i have that figured out, i was gonna start on the adjustment for lighting/coloring/shadowing for the wings.
| Description: |
|
| Filesize: |
127.36 KB |
| Viewed: |
1252 Time(s) |
|
|
|
|
|
|
|
TutorialCraft

Joined: 04 Feb 2011
Posts: 4
|
| Posted: Fri Feb 04, 2011 11:44 am Post subject: |
|
|
Hello,
Your source image is a little bit too low of a resolution to do much fine detail editing. Photoshop CS5 has some great tools for selecting hair, but it is still difficult with such a low res file.
For instance, this image or this image may be good examples to reference from. High Contrast is important to get a good hair extract.
If you have to use your original image, I would suggest drawing the hair, or using hair from another image.
|
|
|
|
|
|
YourOnlySin
Joined: 23 Jan 2011
Posts: 230
|
| Posted: Fri Feb 04, 2011 1:21 pm Post subject: |
|
|
You might get some good contrast with the part of the hair that is against her shirt. Assuming you are familiar with photoshop to some degree, I would create a channel selection and adjust levels to get as much contrast as possible, then go back to your layer, load the selection by choosing the channel and use the refine selection tool to get it right. You don't need to get a perfect extraction of all the hair, just a little bit in the back over the shirt. Once you have a good extraction, you can drag that layer above the butterfly wings so it looks like its flowing over them. It will take some practice!
_________________
http://www.jmerrittphotorestoration.com/ |
|
|
|
|
|
thehermit
Joined: 05 Mar 2003
Posts: 3987
Location: Cheltenham, UK
|
| Posted: Fri Feb 04, 2011 1:33 pm Post subject: |
|
|
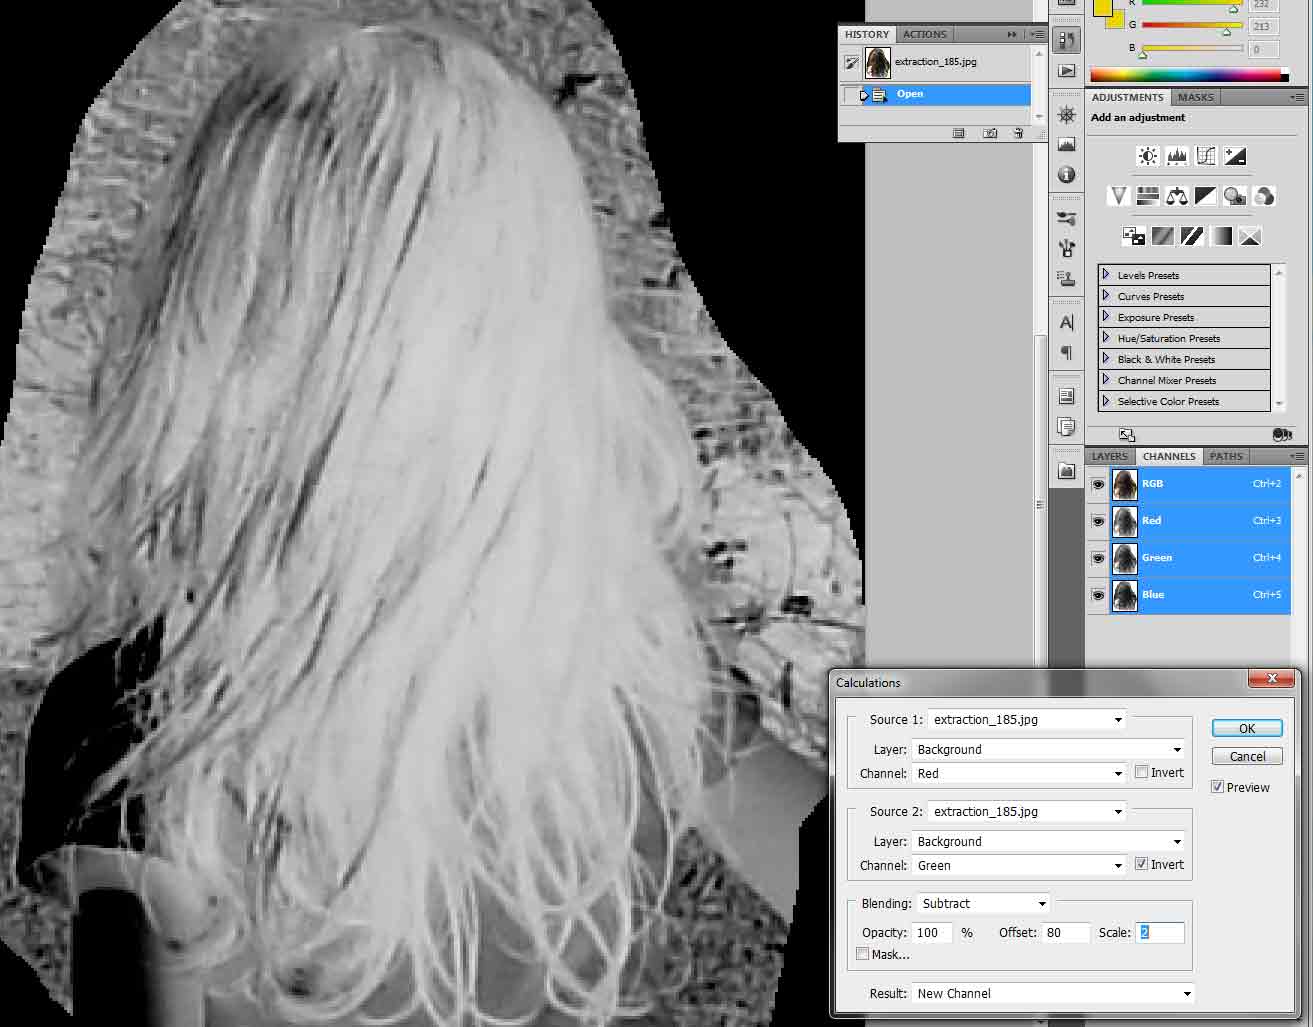
This is a case of patience and a combination of masking methods. For the initial mask I looked at the channels and noted the green and red channels had the best separation from the background that you wish to remove. I went to Image>Calculations and combined the red and green channels and inverted the green channel and changed the blend mode to subtract. This will give you a fairly decent mask to start with. You can combine this with other masking methods to get a decent mask. Use your dodge and burn tools set to highlights or shadows to target areas of hair or background. Use a Brush set to overlay, in either black or white and change opacities.
Oh in the screen-shot if you play around with the scale and offset you can see the usefulness of this method. Try altering blend modes and playing with add subtract and inverse channels.
| Description: |
|
| Filesize: |
72.48 KB |
| Viewed: |
1231 Time(s) |
|
_________________
If life serves you lemons, make lemonade! |
|
|
|
|
|
Vindeta
Joined: 03 Sep 2010
Posts: 21
|
| Posted: Fri Feb 04, 2011 11:25 pm Post subject: |
|
|
Thank you guys for your responses. Patience was defiantly a contributing factor for this one as I actually had to get out of my seat and go do something else from being so frustrated before going back in for another attempt.
@ YourOnlySin, the channel selection and adjusting the Levels and curves to get a good contrast between the hair and the shirt was the first thing i tried. I truly thought it was going to be really easy. I mean common, how hard could it be to get a contrast change between a white shirt and brown hair? I found out it was considerably harder than i thought because every time i thought I had a good contrast and then hit the selection, not all of the hair was added to the selection which what was I was ultimately trying to achieve.
@ TutorialCraft, I do have to agree with the resolution. I can see that if the resolution is too low, it can make things a bit more difficult when trying to accomplish something like this. the original picture happens to be 39.1" x 29.3" taken from a camera which isn't the greatest. In order to post the original here, i ended up scaling it down by close to 75% of what it was which i think kills off some of the resolution that the original still has. Still trying to save up for that DSLR that i have always wanted.
@theHermit, out of all the tutorials i tried to follow, none of them actually said anything about the combining 2 of the channels together using the Image>Calculations method along with making one of the individual channels inverted as well as changing those channels to a different blend mode. This was totally new to me and it gives me more to play with. Thank you for this. Defiantly gives me a new tool to play around with that I never new existed.
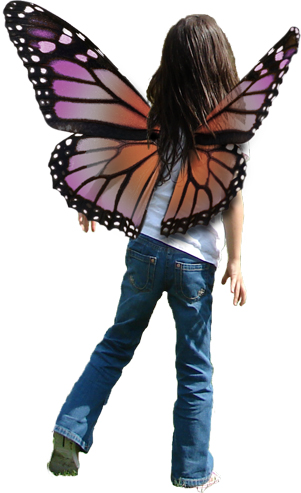
Well after many attempts and with my patience tested with many more hours of upcoming more attempts to perfect the style to some degree being able to pull it off, this is what i have come up with so far.
| Description: |
|
| Filesize: |
112.42 KB |
| Viewed: |
1220 Time(s) |
|
|
|
|
|
|
|
YourOnlySin
Joined: 23 Jan 2011
Posts: 230
|
| Posted: Sat Feb 05, 2011 10:12 am Post subject: |
|
|
Hey, that's pretty darned good! I like the transparency in the wings, but it does allow one to see a little bit of the background near the girls shoulder.
I'm glad you were able to make any combination of those hints work for you. When I wrote to you about crating your selection in the channels palette, I did so assuming that you had an understanding of what the channels palette does. To explain in detail how to work with channels could take a lot of time and there are so many free tutorials out there about working with them.
After ten plus years of using Photoshop products, I consider channels and paths to be the two areas I could use the most instruction. There is so much to learn but, these are such powerful aspects of the software that you almost can't afford not to learn how to use them.
Great job with with the image and great job being able to figure things out with the information given to you!
_________________
http://www.jmerrittphotorestoration.com/ |
|
|
|
|
|
Vindeta
Joined: 03 Sep 2010
Posts: 21
|
| Posted: Sun Feb 06, 2011 9:12 pm Post subject: |
|
|
Ive only really gotten back into using photoshop within the last year. I knew the general idea for the channels palette but its going to take some time figuring out the majority of what it can do.
Ill post the end result in a new thread to see everyone's take on it. Thanks a ton for the help everyone
|
|
|
|
|
|
|


