|
|
| Author |
Message |
unicco33
Joined: 01 Sep 2014
Posts: 5
|
|
|
|
|
 |
SC Photo Designs
Joined: 28 Aug 2014
Posts: 401
Location: United Kingdom
|
 Posted: Mon Sep 01, 2014 8:51 am Post subject: Posted: Mon Sep 01, 2014 8:51 am Post subject: |
 |
|
If filling the background in white with paint bucket doesn't work then I would just magic eraser the background, and if that doesn't work then I would select all with the quick selection tool then copy it into a new layer, maybe refine edge on the selection slightly (using edge detection and adjust) so that you don't miss any pixels. Hope at least one of them works, if not, I will give it a go for you if you like? 
|
|
|
|
|
 |
unicco33
Joined: 01 Sep 2014
Posts: 5
|
 Posted: Mon Sep 01, 2014 11:30 am Post subject: Tried the following Posted: Mon Sep 01, 2014 11:30 am Post subject: Tried the following |
 |
|
Hey,
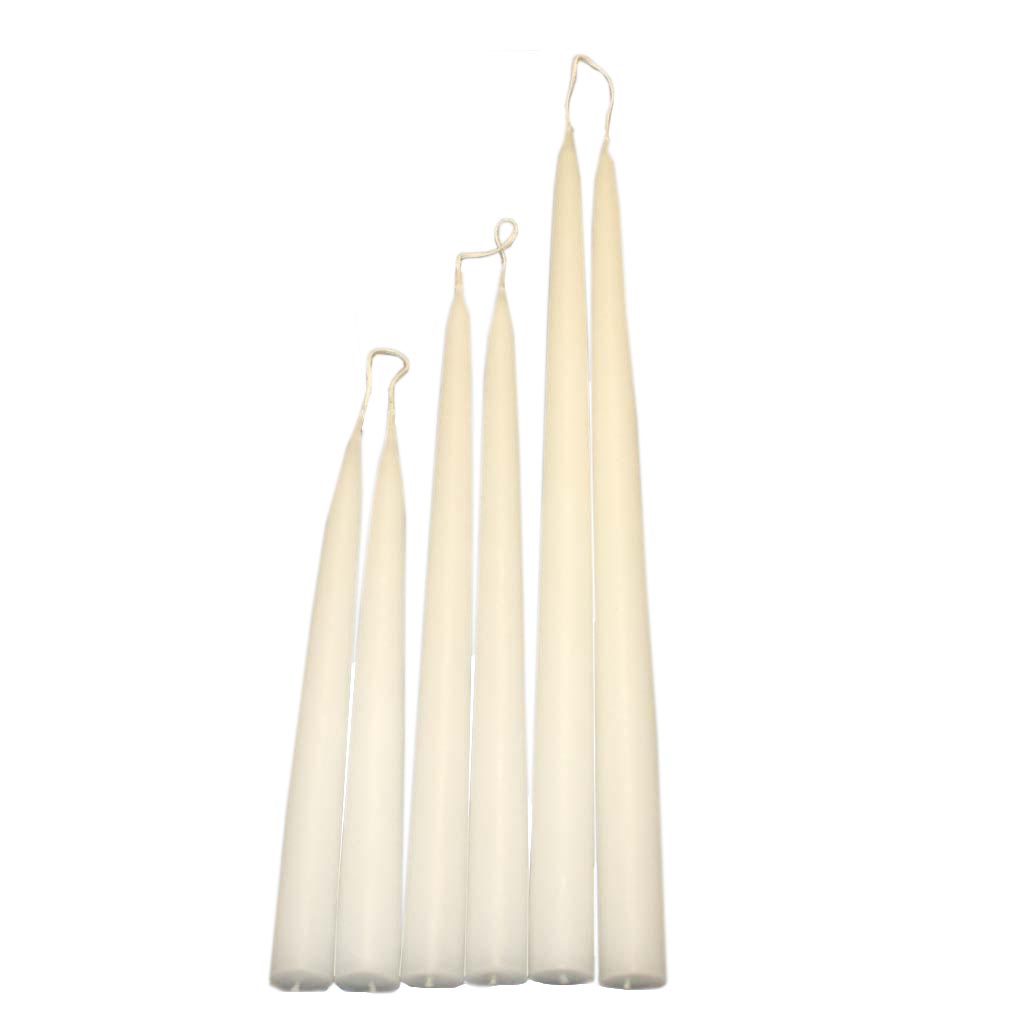
I've tried all these approaches. The best approach is quick selection tool, and adjusting it with refine edge. But the result isn't good. I've a very hard time removing the gray background between the candles.
If you want, I'd very happy if you find the right approach - I've around 50 images, where the background is gray, and has to be removed, so I'm in serious need for the right approach.
Best regards,
Jimmi Nielsen.
|
|
|
|
|
 |
SC Photo Designs
Joined: 28 Aug 2014
Posts: 401
Location: United Kingdom
|
 Posted: Mon Sep 01, 2014 11:58 am Post subject: Posted: Mon Sep 01, 2014 11:58 am Post subject: |
 |
|
I'll have a play around with it tomorrow and let you know what I come up with 
|
|
|
|
|
 |
unicco33
Joined: 01 Sep 2014
Posts: 5
|
 Posted: Tue Sep 02, 2014 1:28 am Post subject: Posted: Tue Sep 02, 2014 1:28 am Post subject: |
 |
|
Perfect, I'm looking forward to see the result 
|
|
|
|
|
 |
Frank1263

Joined: 09 May 2012
Posts: 221
Location: Spain
PS Version: CS6
OS: Windows 7
|
 Posted: Tue Sep 02, 2014 3:37 am Post subject: Posted: Tue Sep 02, 2014 3:37 am Post subject: |
 |
|
I would use the magnetic lasso tool and then if needed refine the selection in quick mask mode.
|
|
|
|
|
 |
SC Photo Designs
Joined: 28 Aug 2014
Posts: 401
Location: United Kingdom
|
 Posted: Tue Sep 02, 2014 4:25 am Post subject: Posted: Tue Sep 02, 2014 4:25 am Post subject: |
 |
|
Ok so I used a mixture of tools, Polygonal (for the majority) Magnetic (for the bottom) First of all I created a white background layer, then once I selected what I wanted to get rid of, I feathered the edge just a little bit, about 1pixels, just to take the harshness off the lines, then cut it and deleted it, I touched it up with a little (paint brush) white/candle colour, and this is what I got, if that's any good to you  obviously if I would take more time on this but this is just to show you obviously if I would take more time on this but this is just to show you 
| Description: |
|
| Filesize: |
30.66 KB |
| Viewed: |
467 Time(s) |

|
|
|
|
|
|
 |
Frank1263

Joined: 09 May 2012
Posts: 221
Location: Spain
PS Version: CS6
OS: Windows 7
|
 Posted: Tue Sep 02, 2014 4:48 am Post subject: Posted: Tue Sep 02, 2014 4:48 am Post subject: |
 |
|
Nicely done SC. I would´ve put some shadow on the bottom though, makes it look more realistic.
|
|
|
|
|
 |
SC Photo Designs
Joined: 28 Aug 2014
Posts: 401
Location: United Kingdom
|
 Posted: Tue Sep 02, 2014 7:13 am Post subject: Posted: Tue Sep 02, 2014 7:13 am Post subject: |
 |
|
Thank you very much Frank1263  good idea about the shadow too! good idea about the shadow too!
|
|
|
|
|
 |
unicco33
Joined: 01 Sep 2014
Posts: 5
|
 Posted: Tue Sep 02, 2014 10:37 am Post subject: Posted: Tue Sep 02, 2014 10:37 am Post subject: |
 |
|
Thanks alot for the good work. I really appreciate it 
|
|
|
|
|
 |
|


