|
|
| Author |
Message |
YosPhil
Joined: 12 Mar 2006
Posts: 3
|
|
|
|
|
 |
swanseamale47
Joined: 23 Nov 2004
Posts: 1478
Location: Swansea UK
|
 Posted: Sun Mar 12, 2006 4:34 pm Post subject: Posted: Sun Mar 12, 2006 4:34 pm Post subject: |
 |
|
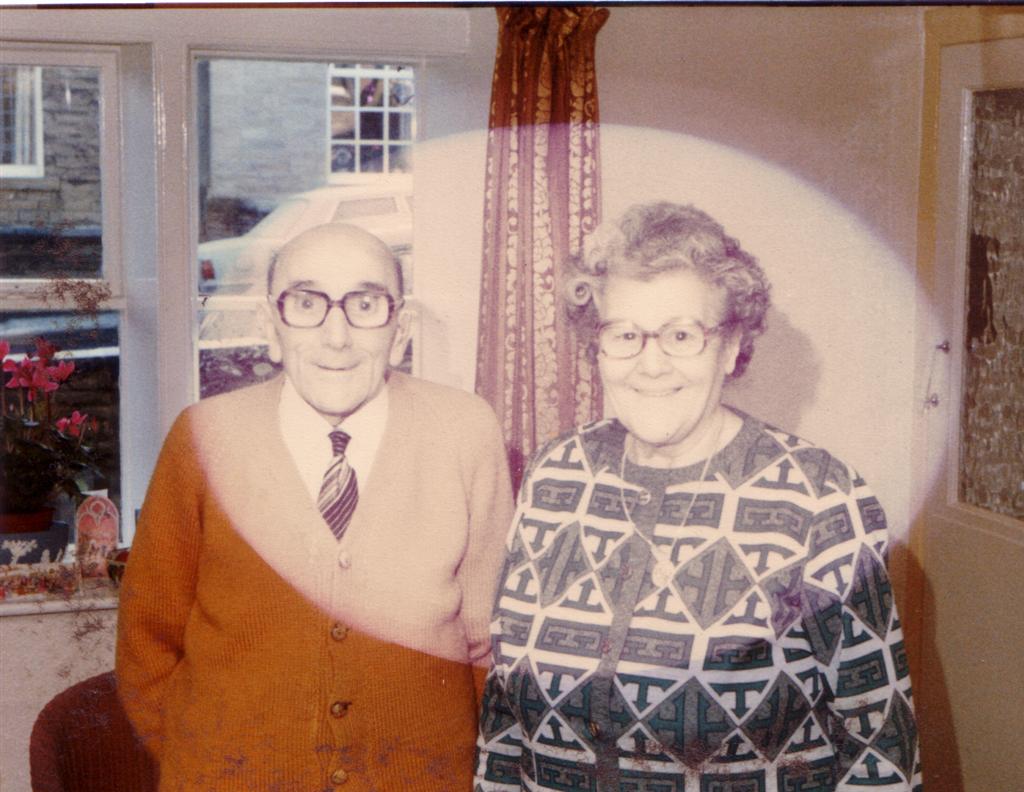
It's a fair old job, first you will have to increase the density in the middle part (try duplicating layers) then sorting out the colour, my guess is you'll end up hand colouring it by painting in the colour on a new layer, set to overlay or colour, then a bit of cloning to get rid of the oval part, all in all, tricky but not impossible.
My option would be a quick-ish fix of sort out the density and convert to B+W, that solves the colour problem. Wayne
| Description: |
|
| Filesize: |
142.71 KB |
| Viewed: |
785 Time(s) |
|
|
|
|
|
|
|
YosPhil
Joined: 12 Mar 2006
Posts: 3
|
| Posted: Sun Mar 12, 2006 5:12 pm Post subject: Thanks Wayne |
|
|
Thanks Wayne,
With my limited knowledge of PS I was guessing that I'd have to paint over each bit on a layer. I did try the patch tool but it didn't do anything even though I lasooed the faded jumper and dragged to the brown bit, presumably there was a setting wrong somewhere.
Thanks again,
Phil Walker.
|
|
|
|
|
|
swanseamale47
Joined: 23 Nov 2004
Posts: 1478
Location: Swansea UK
|
| Posted: Mon Mar 13, 2006 2:51 am Post subject: |
|
|
you could use the patch tool for the guys jacket (effectivly cloning bits) to repair the missing bits, I find the clone tool easier and quicker, to restore the pic properly would be a reasonably time consuming job. Phil theres options for destination etc on the top tool bar, thats probably why the patch tool didn't work right for you.
Select the area you want to use for the repair, click the destination and drag the patch over the damaged area. Wayne
|
|
|
|
|
|
qubert
Joined: 24 Jul 2004
Posts: 253
|
| Posted: Tue Mar 14, 2006 6:23 pm Post subject: Re: HELP -- How do I fix a faded photo |
|
|
| YosPhil wrote: | I was at my Mums yesterday and noticed a photo of Grandma and Grandad was badly faded and when I removed the mount saw the extent of the oval middle bit that had been exposed to the light. Foolishly, as I'm very new to Photoshop, I claimed that could fix it so I brought it home and scanned it. That's as far as I've got, I'm absolutely stumped and now realise how little I've learned from online tutorials etc. Can anyone out there point me in the right direction?
I've attached the photo.
Thanks in anticipation  |
I have tried to work on this photo for you with little success. Maybe if you go to http://www.photoshoptv.com they maybe able to point you in the right direction. I had trouble getting the colors to match correctly in your photo.
Good luck!
_________________
Qubert |
|
|
|
|
|
lasa

Joined: 08 Aug 2005
Posts: 1090
Location: Florida
PS Version: CS
OS: MS XP
|
| Posted: Tue Mar 14, 2006 10:01 pm Post subject: |
|
|
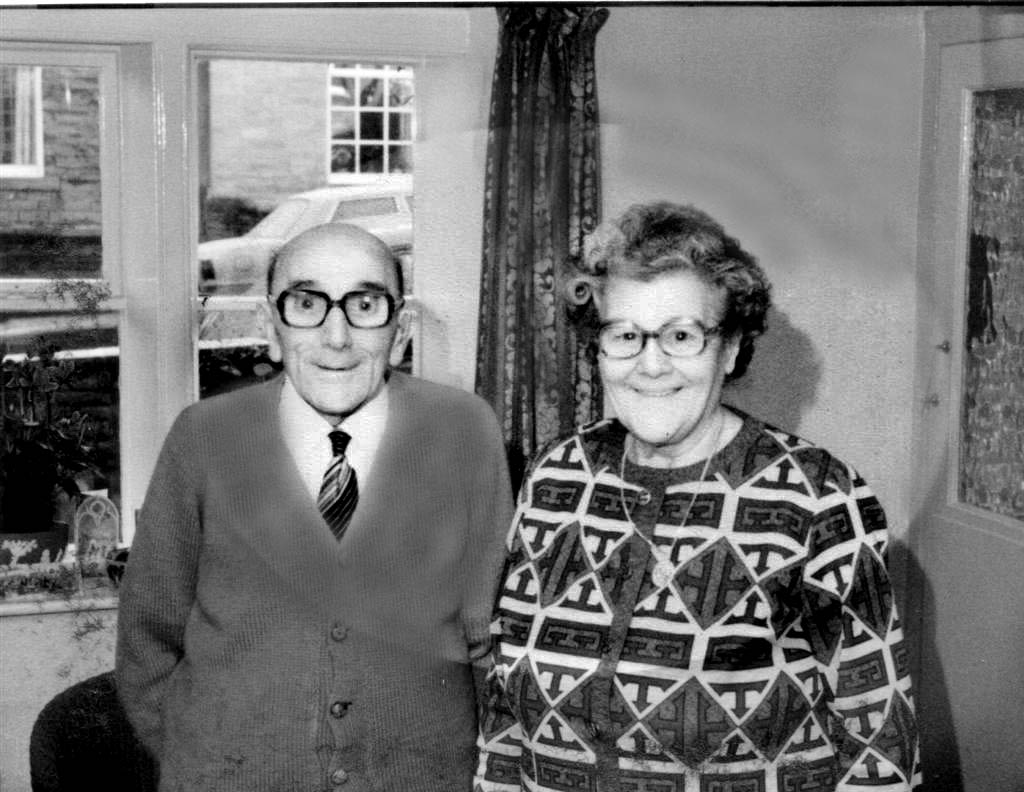
Definetly do-able but a lot of work if you want to make it look good... I think I was on my way but need to crash.
I did this by first desaturating to BW. I cloned /patched most of the picture.
The clone brush I would switch between 40%-85% opacity with the mode set to either "lighter" or "darker" depending on wether I was blending dark to light etc...this way you can blend the edges without seeing a pattern. it only clones either lighter or darker and since its at 40/80% it really blends in. Also used a the dodge/burn tools.
Once I had the look i wanted I copied the bottom of his jacket (which has texture) onto its own layer turned upside down and lowered the opacity untill the texture just barely shows. Used a large soft eraser set to 25% to blend in the edeges.
Hope this helps...now to color the picture and have it look realistic is whole nother beast.
Good luck,
Lasa
| Description: |
|
| Filesize: |
73.08 KB |
| Viewed: |
749 Time(s) |
|
Last edited by lasa on Wed Mar 15, 2006 6:23 am; edited 2 times in total |
|
|
|
|
|
swanseamale47
Joined: 23 Nov 2004
Posts: 1478
Location: Swansea UK
|
| Posted: Wed Mar 15, 2006 2:46 am Post subject: |
|
|
Nicely done Lasa! neater than mine. Wayne
|
|
|
|
|
|
YosPhil
Joined: 12 Mar 2006
Posts: 3
|
| Posted: Wed Mar 15, 2006 3:31 am Post subject: Thanks Lasa |
|
|
Lasa,
Thats superb, I'll give it a go with the larger sized original and try to follow your instructions.
Thanks again for all your help.
|
|
|
|
|
|
lasa
Joined: 08 Aug 2005
Posts: 1090
Location: Florida
PS Version: CS
OS: MS XP
|
| Posted: Thu Mar 16, 2006 6:26 pm Post subject: |
|
|
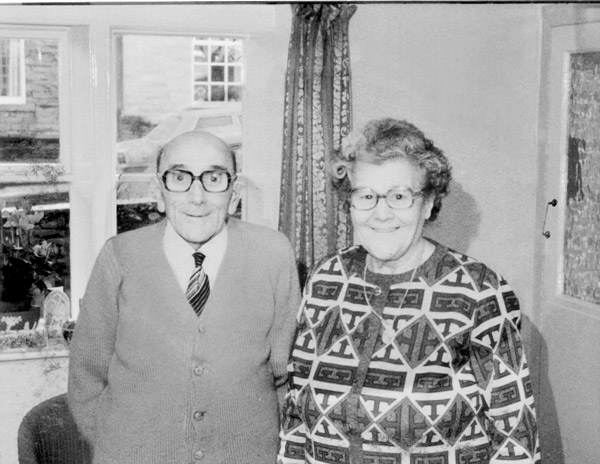
Just read my post...sorry I forgot that I started by making an oval over the light area and darkend with levels, then inverted the selection and used the levels again to lighten the background...
Then cloned as indicated to get rid of the oval contrast.
Sorry,
lasa
Last edited by lasa on Fri Mar 17, 2006 8:59 pm; edited 1 time in total |
|
|
|
|
|
grannygeek
Joined: 23 Feb 2006
Posts: 149
Location: Pennsylvania
|
| Posted: Thu Mar 16, 2006 7:48 pm Post subject: |
|
|
That's a fabulous job!
_________________
and the wisdom to know the difference... |
|
|
|
|
|
|