|
|
| Author |
Message |
glsmaster
Joined: 24 Jul 2005
Posts: 4
Location: the ><G! home :: ;D
|
|
|
|
|
 |
Jersey Hacker
Joined: 08 Jun 2005
Posts: 864
Location: Jersey, Channel Islands, UK
|
 Posted: Sun Jul 24, 2005 1:40 pm Post subject: Posted: Sun Jul 24, 2005 1:40 pm Post subject: |
 |
|
Sorry, i cant really understand your problem, but welcome to photoshop forums i hope someone can help you
_________________
www.jerseyhacker.co.uk
Free File Uploader for Everyone to use |
|
|
|
|
 |
Gallo_Pinto

Joined: 15 Jul 2005
Posts: 785
Location: BC, Canada
|
 Posted: Sun Jul 24, 2005 4:47 pm Post subject: Posted: Sun Jul 24, 2005 4:47 pm Post subject: |
 |
|
I'm afarsid I'm also having trouble understanding the problem.
Do you want to achieve the look in the pic you posted?
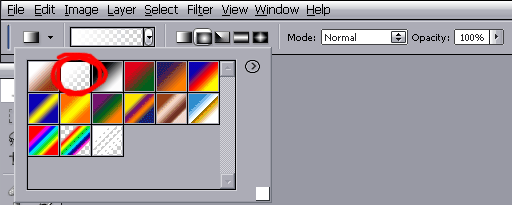
if so, the gradient tool will do that quickly. Slect white as your foreground colour. THen, up at the top of the screen, open the dropdown and choose the option I've circled in red.
I'm not sure what you mean by "fuse with background". where the dropdown in the pic says "normal" try some other options. I suggest "colour dodge" or "overlay".
sorry I can't help very well.
(if your native language is French, I might be able to help better)
| Description: |
|
| Filesize: |
14.76 KB |
| Viewed: |
574 Time(s) |

|
_________________
brush your hair and comb your teeth |
|
|
|
|
 |
glsmaster
Joined: 24 Jul 2005
Posts: 4
Location: the ><G! home :: ;D
|
 Posted: Sun Jul 24, 2005 7:19 pm Post subject: Posted: Sun Jul 24, 2005 7:19 pm Post subject: |
 |
|
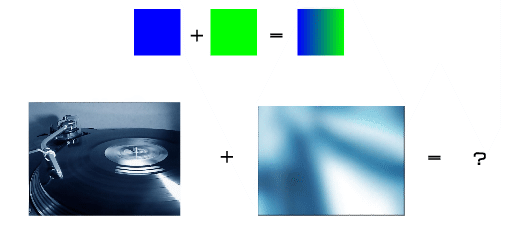
ok guys don't worry ... let's to see if it is more understandable ;D
| Description: |
|
| Filesize: |
27.76 KB |
| Viewed: |
568 Time(s) |

|
_________________
><G! |
|
|
|
|
 |
Gallo_Pinto

Joined: 15 Jul 2005
Posts: 785
Location: BC, Canada
|
 Posted: Sun Jul 24, 2005 10:07 pm Post subject: Posted: Sun Jul 24, 2005 10:07 pm Post subject: |
 |
|
yeah, easy as pie.
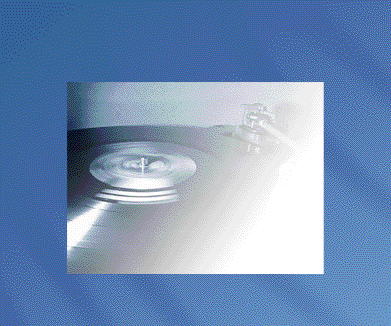
I've attached a pic of what i think you want, if it looks good this is how you do it:
have two layers, onw with the blue-white gradient, one with the record. Order doesn't matter.
highlight the top layer in the layers palette. At the bottom of the palette, click the "add layer mask" or "add vector mask" button. it looks like a circle. beside the top layer in the palette there appears a white square. This is an icon that represents your mask.
if you paint on a mask with black, it turns the layer's opacity where you painted to 0%. white is 100% opacity.
grab the gradient tool and drag a black-to-white gradient across the layer mask. Voila, you've got what i've got in my pic.
Sorry if that's not well-enough explained, feel free to ask more questions.
| Description: |
|
| Filesize: |
13.38 KB |
| Viewed: |
550 Time(s) |

|
_________________
brush your hair and comb your teeth |
|
|
|
|
 |
glsmaster
Joined: 24 Jul 2005
Posts: 4
Location: the ><G! home :: ;D
|
 Posted: Sun Jul 24, 2005 11:54 pm Post subject: thanks a lot :: just what i need Posted: Sun Jul 24, 2005 11:54 pm Post subject: thanks a lot :: just what i need |
 |
|
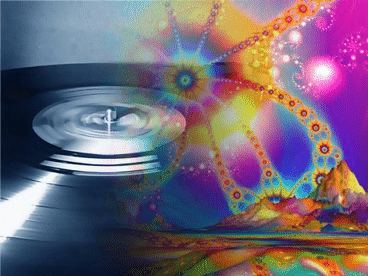
Man! YOU ROCK! ... you saved my day ^_^ ... sorry if at beginning I couldn't explain my problem... is just that I couldn't to express how is it ... thankyou again! ^_^ ....
| Description: |
|
| Filesize: |
46.42 KB |
| Viewed: |
542 Time(s) |

|
| Description: |
|
| Filesize: |
67.1 KB |
| Viewed: |
542 Time(s) |

|
_________________
><G! |
|
|
|
|
 |
Gallo_Pinto

Joined: 15 Jul 2005
Posts: 785
Location: BC, Canada
|
 Posted: Mon Jul 25, 2005 6:49 pm Post subject: Posted: Mon Jul 25, 2005 6:49 pm Post subject: |
 |
|
I'm always happy to help.
happier still to be appreciated 
Good luck in your Photoshop future.
_________________
brush your hair and comb your teeth |
|
|
|
|
 |
Jersey Hacker
Joined: 08 Jun 2005
Posts: 864
Location: Jersey, Channel Islands, UK
|
 Posted: Wed Jul 27, 2005 12:59 am Post subject: Posted: Wed Jul 27, 2005 12:59 am Post subject: |
 |
|
Nice to see your problem was solved!
_________________
www.jerseyhacker.co.uk
Free File Uploader for Everyone to use |
|
|
|
|
 |
|


