|
|
| Author |
Message |
qwik3r
Joined: 15 Jun 2005
Posts: 1
|
 Posted: Wed Jun 15, 2005 10:16 pm Post subject: Photo enhance techniques? Posted: Wed Jun 15, 2005 10:16 pm Post subject: Photo enhance techniques? |
 |
|
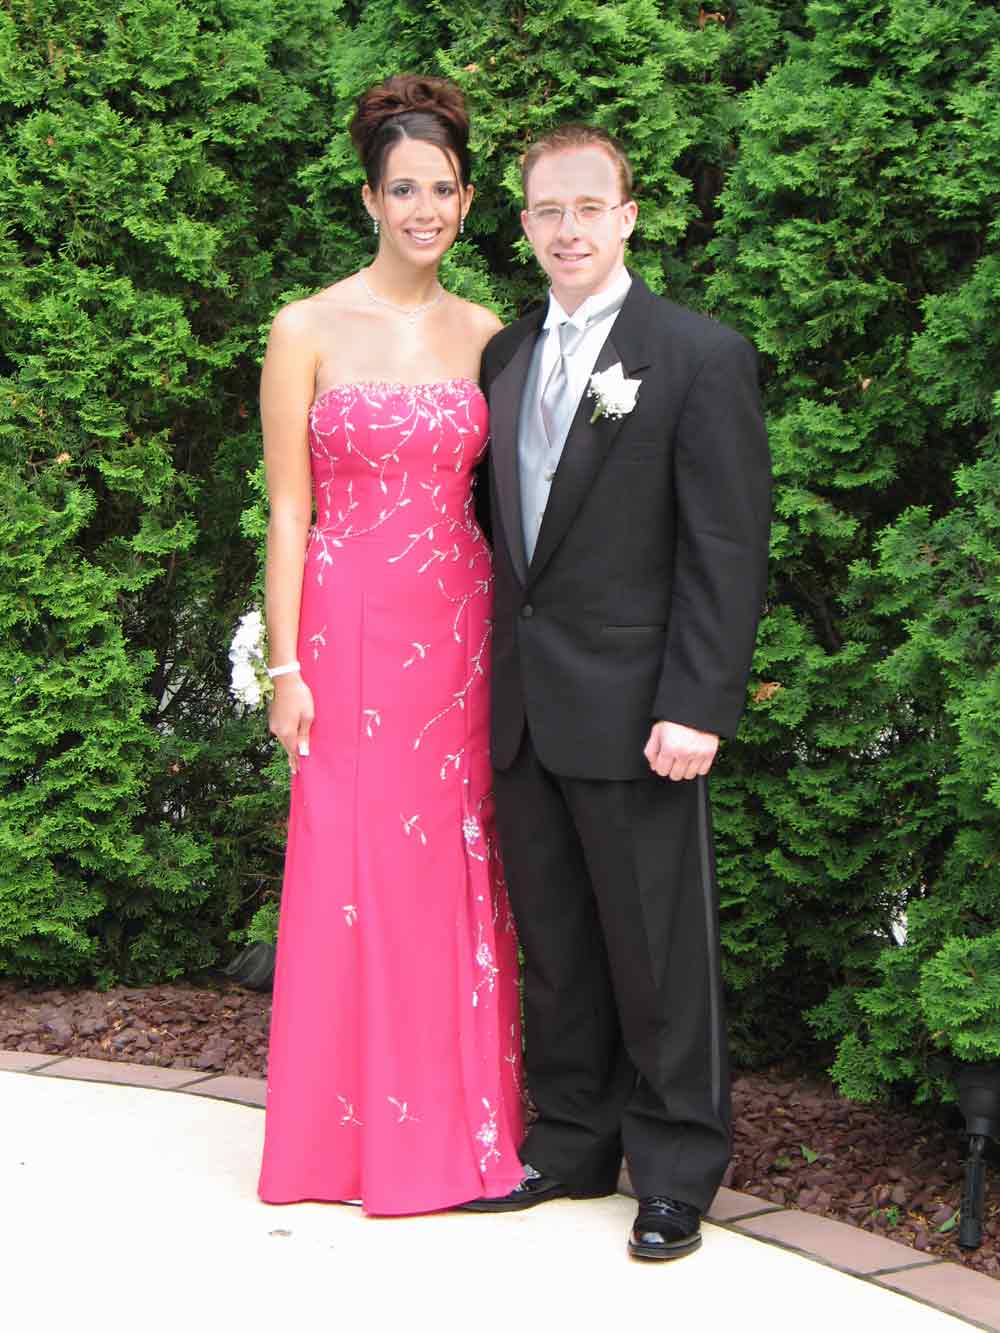
Hey guys, new to the forum but have been using PS for a few years, would still call myself a novice who does some small graphic design and retouching every now and again. Anyway i have a picture that my friend gave me of him and his GF from they're prom. Now i have already edited it and printed it out with my canon photo printer and the girl looks good but the guy is white and looks to be over exposed. I played with the levels, the sharpness and curves and haven't been able to come up with anything that really pops and makes the pic come alive. I was wondering if someone could share some techniques with me or possibly be kind enough to edit the photo for me and tell me what they did exactly. I have supplied the orignal unedited image in JPG format here: http://www.firebirdomain.com/jNrobORG.jpg Any help would be great. Thanks in advance.
P.S If anyone does take a crack at editing it for me please leave it in its orginal format so that I may be able to change the size for different sized photos, thanks a bunch.
|
|
|
|
|
 |
swanseamale47
Joined: 23 Nov 2004
Posts: 1478
Location: Swansea UK
|
 Posted: Sun Jun 26, 2005 7:28 am Post subject: Posted: Sun Jun 26, 2005 7:28 am Post subject: |
 |
|
Heres what I did. Wayne
Make a duplicate image (image>duplicate)
lower contrast on the original (image>ajustments>brightness/contrast ) set contrast to - 25
Duplicate layer (layer>duplicate layer) and set the blending mode to colour
Make a hue/sat layer from ajustment layers (layers palette>ajustment layer>hue/saturation) and up the saturation to 50
go to the background layer and add a high pass filter (filters>others>high pass) and set the radius to 1
Now it should look orange, what you are seeing is the basic colours.
Now go to the middle layer (the duplicate) use the eye dropper tool to select a colour near the blown out area (the face) and using a low opacity soft brush paint over the grey areas, go easy you only need to just cover the area or it will look wrong, repete as needed, to check the effect turn off the hue/sat layer and change the blend mode of the middle layer to normal instead of colour. When you are happy, delete the hue/sat layer (drag it to the bin on the layers palette) ajust the image contrast and flatten the layers
Hope that helps
It wont let me upload a full image, it keeps saying max file size 200kb W
| Description: |
|
| Filesize: |
102.69 KB |
| Viewed: |
1202 Time(s) |

|
|
|
|
|
|
 |
Datameister

Joined: 28 Jun 2005
Posts: 506
|
 Posted: Tue Jun 28, 2005 11:45 pm Post subject: Posted: Tue Jun 28, 2005 11:45 pm Post subject: |
 |
|
The link isn't working for me. It says it cannot find the server.
There's something not quite right about the corrected image, though. I can see the edges of the edited area on his face, and his face is a bit grayish. Overexposed areas usually have low saturation, so merely darkening them without adjusting the saturation can leave a grayish tint.
_________________
Interested in showcasing your special effects or learning some new ones from the masters? Check out PSFX! |
|
|
|
|
 |
|


