|
|
| Author |
Message |
Tonyb0606
Joined: 31 Dec 2014
Posts: 4
|
 Posted: Wed Dec 31, 2014 5:47 am Post subject: Hollow square Posted: Wed Dec 31, 2014 5:47 am Post subject: Hollow square |
 |
|
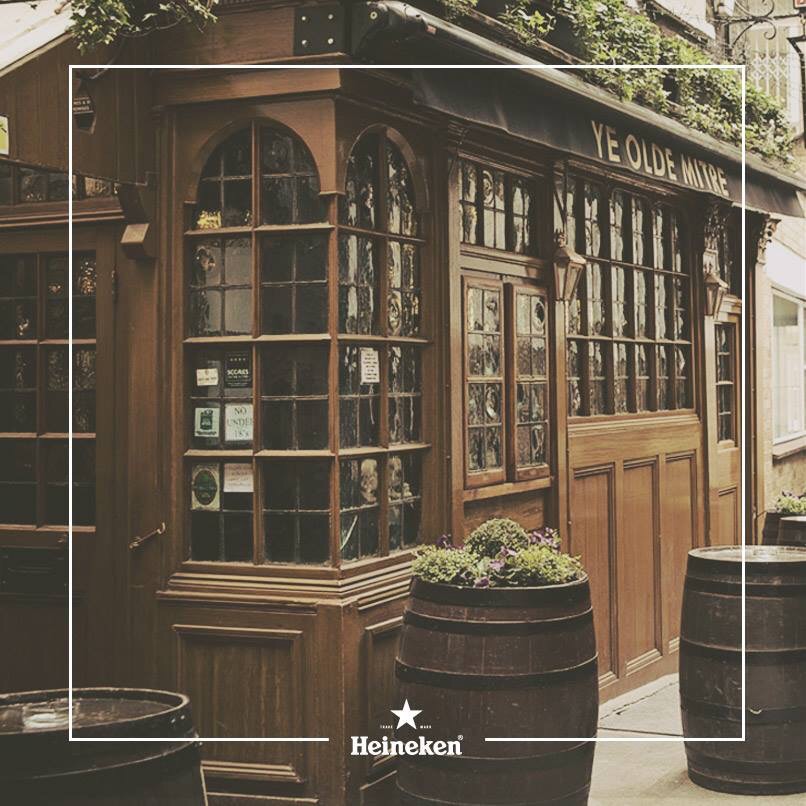
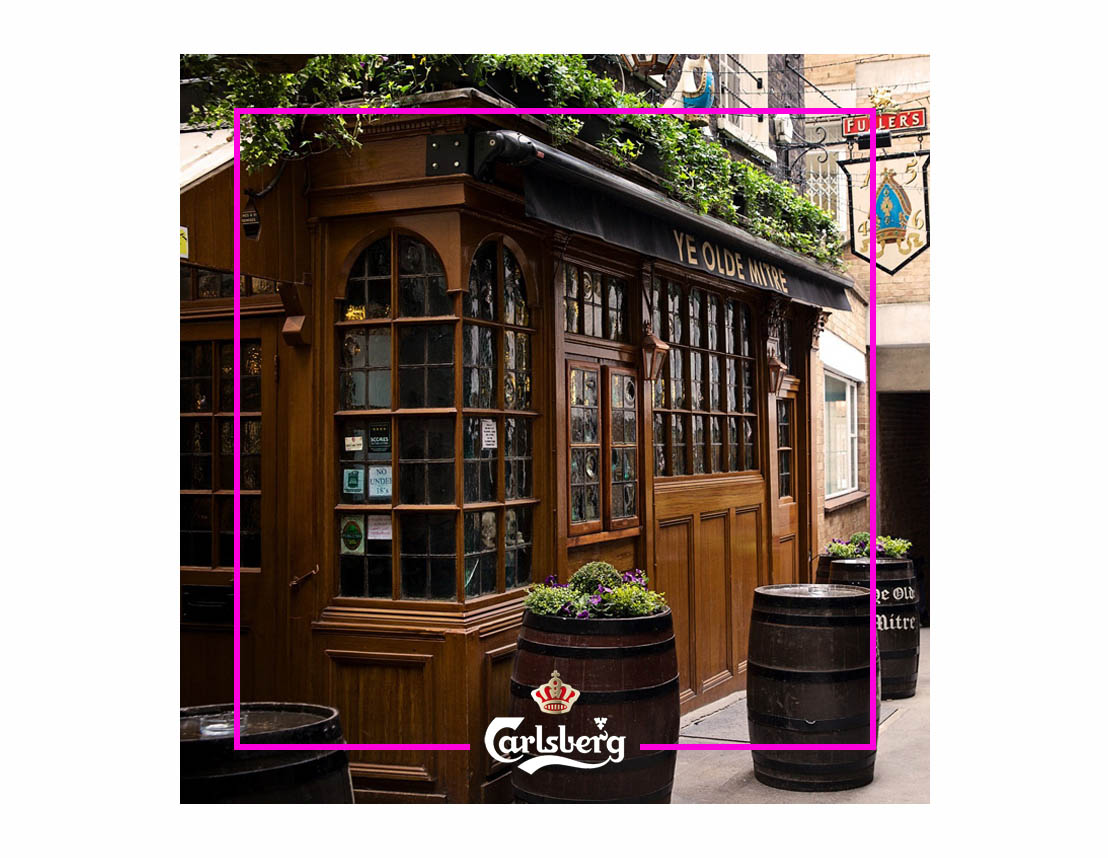
Can somebody help me please. I have recently seen a rather eye catching Heineken campaign and would like to use a similar design for my business. I'm a bit OCD about the hollow square being exactly in the middle ie, equidistant from each side. The image attached is what I am aiming for. Any tips would be massively appreciated. [img][/img]
| Description: |
|
| Filesize: |
163.77 KB |
| Viewed: |
524 Time(s) |
|
|
|
|
|
|
 |
Tonyb0606
Joined: 31 Dec 2014
Posts: 4
|
 Posted: Wed Dec 31, 2014 8:01 am Post subject: Posted: Wed Dec 31, 2014 8:01 am Post subject: |
 |
|
I forgot to mention that I need an explanation on how to actually create the hollow square!
Thanks everyone
|
|
|
|
|
 |
d^_^b
Joined: 14 Jan 2015
Posts: 194
PS Version: CC 2014
OS: Win 8 64-bit Home / Win 7 64-bit Work
|
 Posted: Wed Jan 14, 2015 7:19 am Post subject: Posted: Wed Jan 14, 2015 7:19 am Post subject: |
 |
|
01. With your picture opened, create a new layer
02. Click the View menu > New Guide > Vertical > 50% > OK. Repeat to create a horizontal guide at 50%
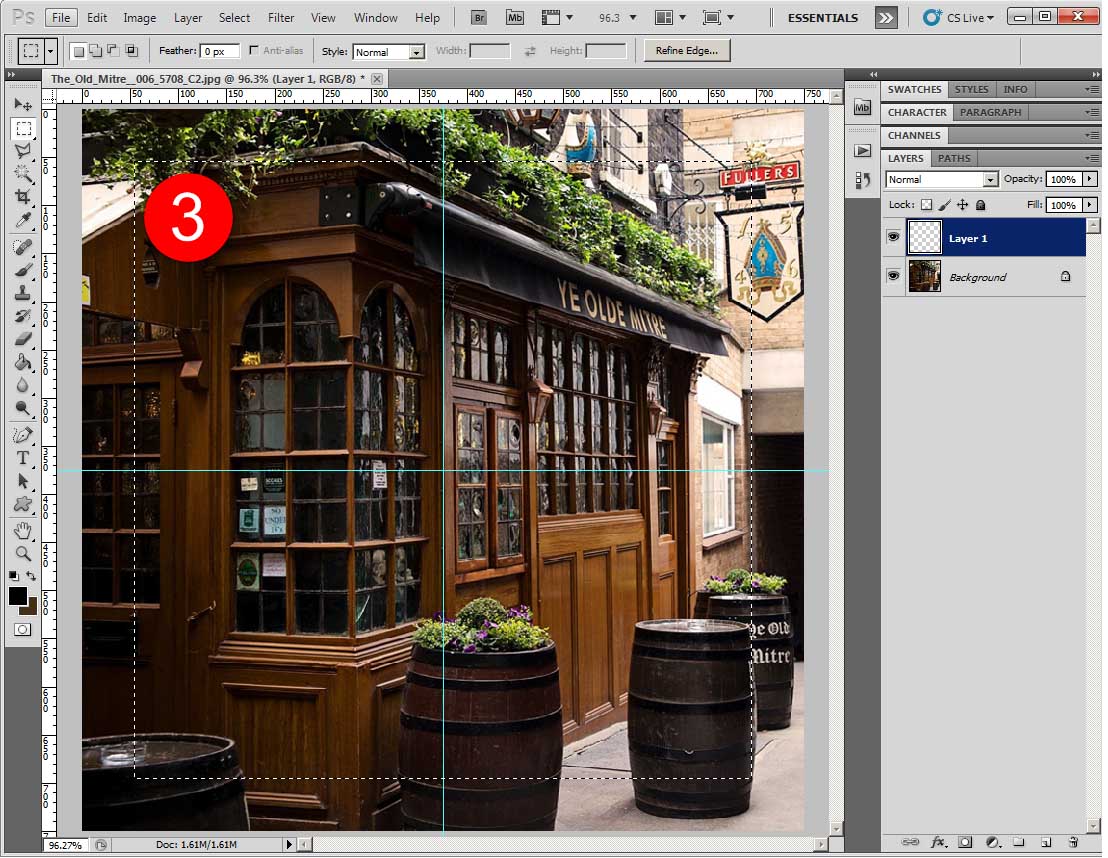
03. Select the square marquee tool, place the cursor at the center, hold down SHIFT ALT and drag out a perfect square to the size you require
04. With the bucket tool, fill the square with a colour of your choosing
05. Switch back to the marquee tool, right-click the selection and select 'Transform Selection'
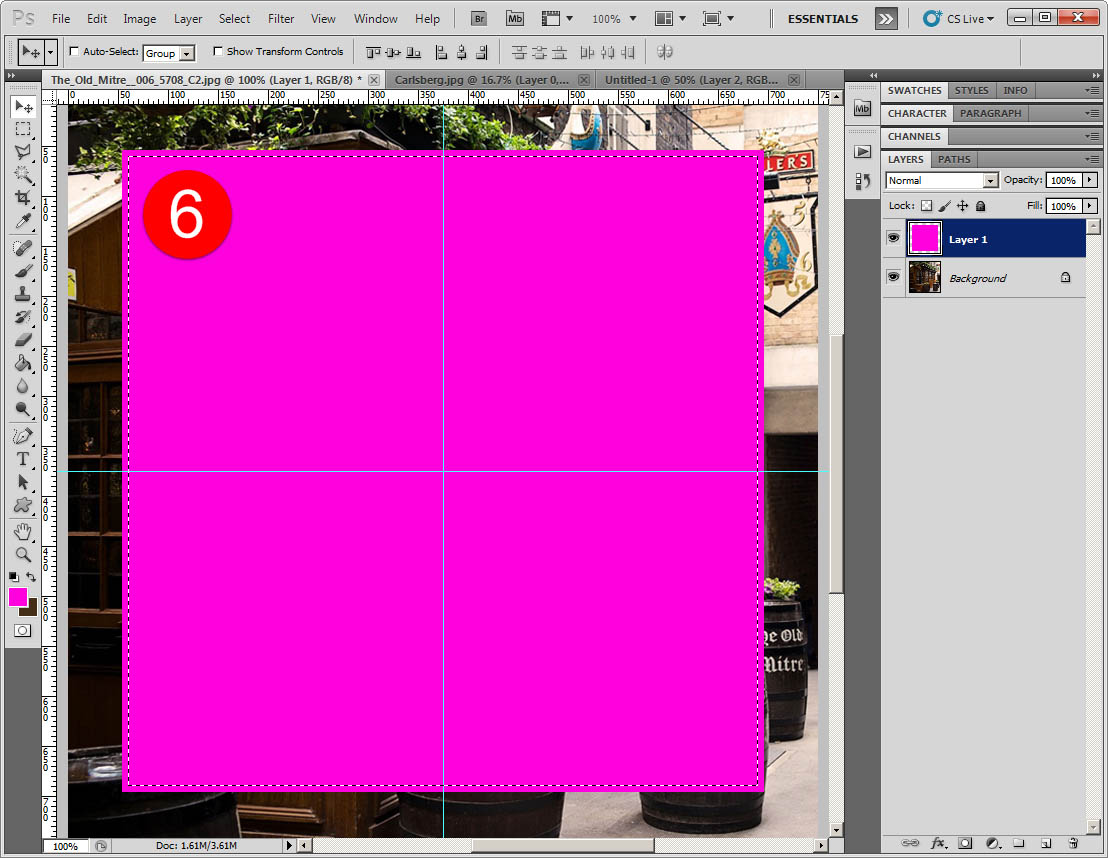
06. Hold down Shift ALT, drag the square to make it smaller and hit Enter
Continued...
| Description: |
|
| Filesize: |
191.31 KB |
| Viewed: |
418 Time(s) |
|
| Description: |
|
| Filesize: |
187.5 KB |
| Viewed: |
418 Time(s) |
|
Last edited by d^_^b on Wed Jan 21, 2015 4:42 am; edited 1 time in total |
|
|
|
|
 |
d^_^b
Joined: 14 Jan 2015
Posts: 194
PS Version: CC 2014
OS: Win 8 64-bit Home / Win 7 64-bit Work
|
 Posted: Wed Jan 21, 2015 4:42 am Post subject: Posted: Wed Jan 21, 2015 4:42 am Post subject: |
 |
|
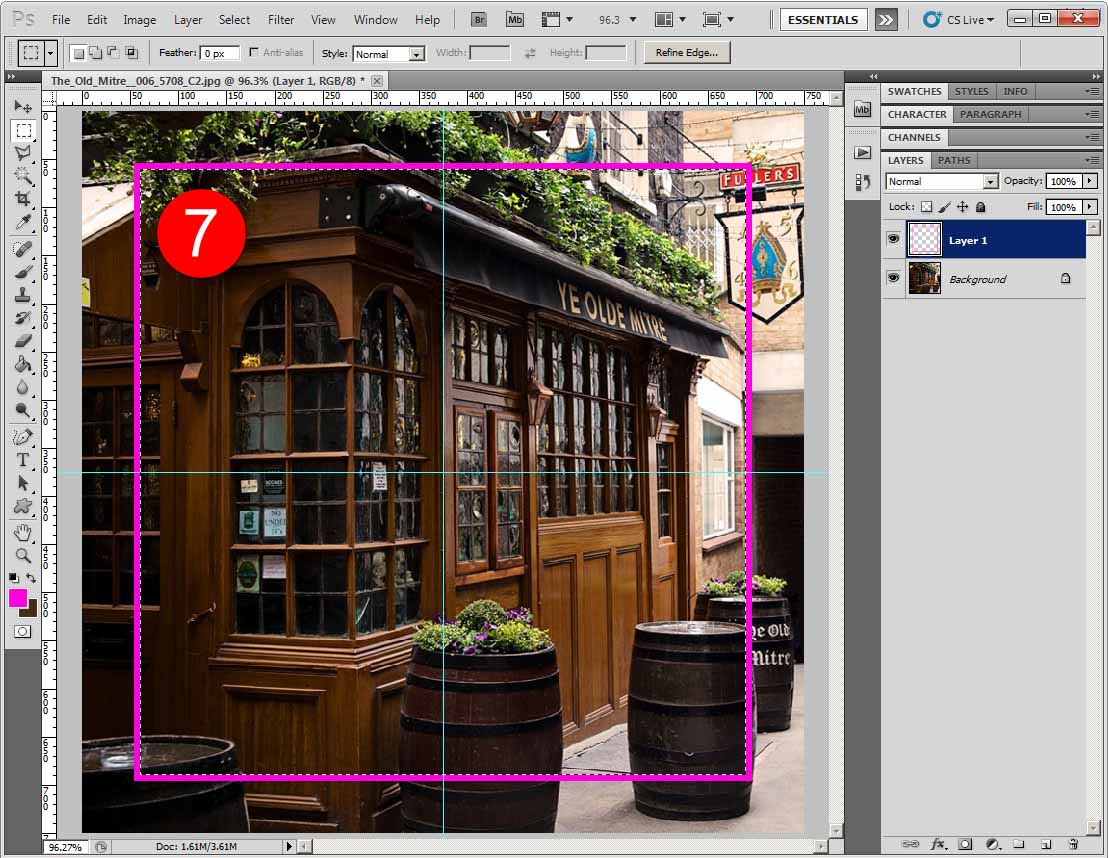
07. Hit Delete to create your hollow square
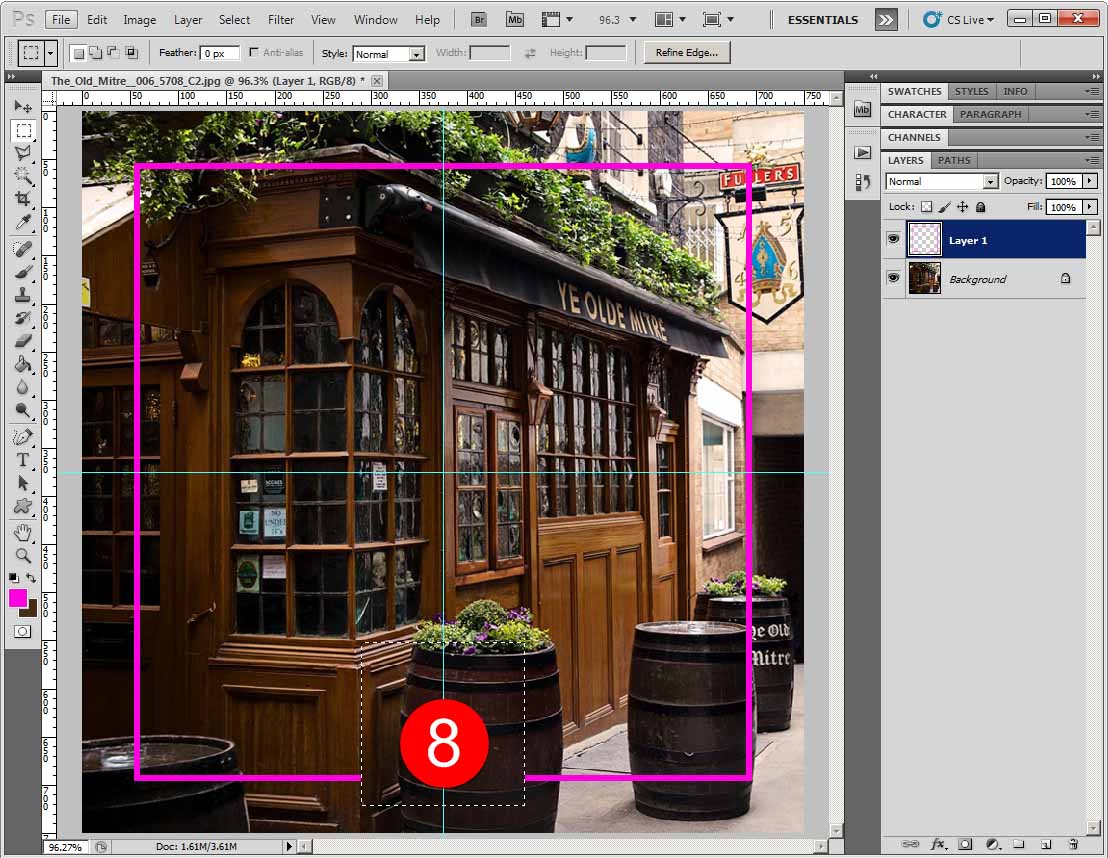
08. 11. Repeat step 3 to draw a small square, use the cursor key to move it down and hit delete to create the cut
09. Switch to the layer containing your picture and use the keyboard short CTRL A to select all
10. Switch back to your hollowed square layer, click the Layer menu > Align Layers to Selection > Vertical Centers.
11. Click the Layer menu > Align Layers to Selection > Horizontal Centers. Your hollowed square is now perfectly centered.
12. Add text/logos...
| Description: |
|
| Filesize: |
178.31 KB |
| Viewed: |
417 Time(s) |
|
| Description: |
|
| Filesize: |
174.8 KB |
| Viewed: |
417 Time(s) |
|
| Description: |
|
| Filesize: |
182.41 KB |
| Viewed: |
416 Time(s) |
|
|
|
|
|
|
 |
|


