|
|
| Author |
Message |
doubleueffdesign
Joined: 25 Aug 2007
Posts: 2
Location: Manchester, England
|
 Posted: Mon Aug 27, 2007 4:11 am Post subject: Colour Replacemnet Posted: Mon Aug 27, 2007 4:11 am Post subject: Colour Replacemnet |
 |
|
Hi
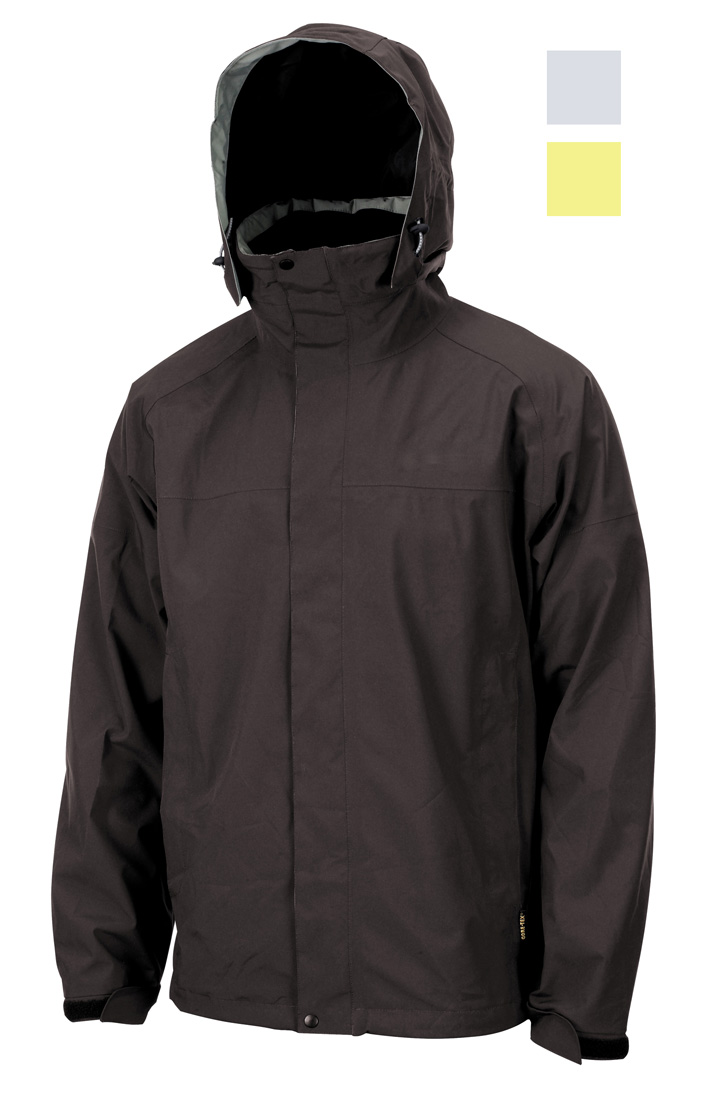
I am currently working on a new project for a well known British Waterproof clothing company - With the timelines for samples (being manufactured in China) they only have one colour of one style of jacket available for photography, this image has then to be retouched into the 5 other colourways - with me so far?
The burning question is: the garment colour can be anywhere from a a muddy brown colour even black, ranging through to a light pumice colour (almost white) so.... how do I turn an image of a brown jacket into a an almost white image whilst keeping it looking as fresh as possible?
Any ideas? all the mid tone colours are a breeze - its just a hue/saturation tweak but getting from a dark colour to a light colour is very tricky and vice versa
I'd appreciate any help any of you lot may have to this seeingly easy task (in the eyes of the client) but believe me its harder than you think!
Cheers
WF
|
|
|
|
|
 |
BryanDowning
Joined: 05 Jul 2004
Posts: 1554
Location: California, USA
|
| Posted: Mon Aug 27, 2007 4:34 pm Post subject: |
|
|
Can you post a sample? I'd like to take a whack at it.
_________________
Best Regards,
Bryan Downing
bryandowning.com |
|
|
|
|
|
doubleueffdesign
Joined: 25 Aug 2007
Posts: 2
Location: Manchester, England
|
| Posted: Tue Aug 28, 2007 1:59 am Post subject: Test Image |
|
|
Hi
Please see attached image (just lo res at this point) -ive given you the two target models for this style (very pale grey/blue and a pale gold)
Please have a go and see what you can come up with - bear in mind that I have 125 styles to do 3 different colourways in!
So wish me luck
Cheers
WF
| Description: |
|
| Filesize: |
139.46 KB |
| Viewed: |
202 Time(s) |
|
|
|
|
|
|
|
BryanDowning
Joined: 05 Jul 2004
Posts: 1554
Location: California, USA
|
| Posted: Tue Aug 28, 2007 1:25 pm Post subject: |
|
|
Here's what I came up with. It's not perfect, but more attention to detail would probably help. I did these very quickly to get the point across.
http://dev.onesourceed.com/bryan/jacket.zip
Below is a history log of everything I did.
| Code: |
2007-08-28T12:08:13-08:00 File Untitled-1 opened
Make New: document
Preset: Clipboard
Paste
Paste Anti-alias: none
Hide red channel
Hide green channel
Select red channel
Select green channel
Select blue channel
Select green channel
Select red channel
Select RGB channel
Duplicate Layer
Duplicate current layer
Curves
Curves Adjustment: curves adjustment list
curves adjustment
Channel: composite channel
Curve: point list
point: 0, 0
point: 47, 144
point: 255, 255
Select background eraser
Eraser
Hue/Saturation
Hue/Saturation Without Colorize
Adjustment: hue/saturation adjustment list
hue/saturation adjustment
Hue: 0
Saturation: -40
Lightness: 10
Add Layer Mask
Make New: channel
At: mask channel
Using: reveal all
Select brush
Select brush Hard Round 9 pixels
Brush Tool
Brush Tool
Brush Tool
Brush Tool
Exchange Swatches
Brush Tool
Exchange Swatches
Brush Tool
Brush Tool
Brush Tool
Brush Tool
Exchange Swatches
Brush Tool
Brush Tool
Brush Tool
Brush Tool
Brush Tool
Brush Tool
Brush Tool
Brush Tool
Exchange Swatches
Brush Tool
Brush Tool
Brush Tool
Brush Tool
Brush Tool
Brush Tool
Brush Tool
Brush Tool
Brush Tool
Brush Tool
Brush Tool
Brush Tool
Brush Tool
Brush Tool
Brush Tool
Brush Tool
Brush Tool
Brush Tool
Brush Tool
Brush Tool
Brush Tool
Brush Tool
Select brush Hard Round 5 pixels
Brush Tool
Brush Tool
Select brush Hard Round 3 pixels
Brush Tool
Brush Tool
Brush Tool
Brush Tool
Brush Tool
Brush Tool
Brush Tool
Brush Tool
Brush Tool
Brush Tool
Brush Tool
Brush Tool
Hide current layer
Show current layer
Hide current layer
Show current layer
Hide current layer
Show current layer
Hide current layer
Show current layer
Hide current layer
Show current layer
Save As: Photoshop
With Maximize Compatibility
In: C:\Documents and Settings\Bryan\Desktop\gray.psd
Set Foreground Color To: grayscale
Gray: 0
Select Background
Select layer Layer 1 copy
Set Foreground Color To: RGB color
Red: 243.996
Green: 241.996
Blue: 141.996
Duplicate Layer
Duplicate current layer
Hue/Saturation
Hue/Saturation With Colorize
Adjustment: hue/saturation adjustment list
hue/saturation adjustment
Hue: 59
Saturation: 35
Lightness: 0
Brightness/Contrast
Brightness/Contrast Brightness: 16
Contrast: 15
Hide current layer
Hide layer Layer 1 copy
Show layer Layer 1 copy
Show current layer
2007-08-28T12:19:17-08:00 File jacket.psd opened
Open C:\Documents and Settings\Bryan\Desktop\jacket.psd
|
The most important thing I did here was duplicate the original brown. Then on the duplicate run Image>Adjustments>Curves...
Then Ctrl+click one of the medium brown colors from the image. A dot will appear on the diagonal line. Move it around to change that range of color. You can play around with it and get multiple dots by Ctrl+clicking multiple times.
Does that all make sense?
_________________
Best Regards,
Bryan Downing
bryandowning.com |
|
|
|
|
|
|


