|
|
| Author |
Message |
Thresher
Joined: 10 Aug 2005
Posts: 3
|
 Posted: Wed Aug 10, 2005 8:49 am Post subject: Gradient following an objects path Posted: Wed Aug 10, 2005 8:49 am Post subject: Gradient following an objects path |
 |
|
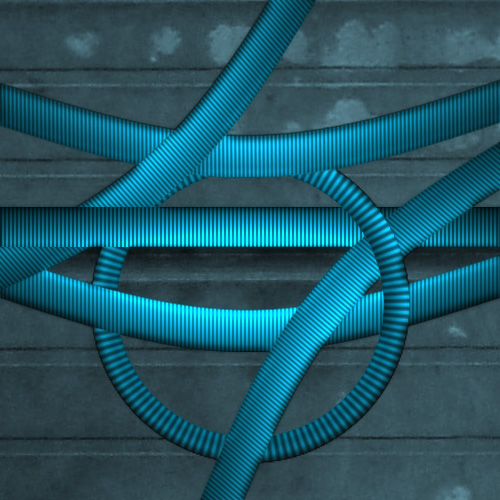
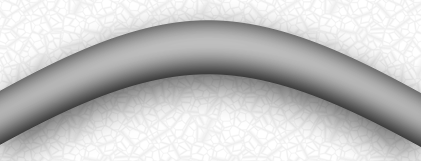
I'm trying to get a gradient fade to follow an objects path. I would like the gradient on top to follow the curve of the object on the bottom, is there any way to do this in Photoshop? If not, I know it's a Photoshop forum, but does anyone know how to accomplish this in Illustrator?

|
|
|
|
|
 |
lasa

Joined: 08 Aug 2005
Posts: 1090
Location: Florida
PS Version: CS
OS: MS XP
|
 Posted: Wed Aug 10, 2005 11:05 am Post subject: Posted: Wed Aug 10, 2005 11:05 am Post subject: |
 |
|
The only way I have ever been able to do it is by making a horizontal tube like you first example then shift it 90 degrees and apply the distort / shear filter, then sending it back 90 degrees... It works, but you would think there would be a better way? have no idea in Illustrator.
If you figure something better in PS please tell us.
Lasa
|
|
|
|
|
 |
Tristan Gray
Joined: 05 Aug 2005
Posts: 47
Location: Halifax, Nova Scotia, Canada
|
 Posted: Wed Aug 10, 2005 11:22 am Post subject: Posted: Wed Aug 10, 2005 11:22 am Post subject: |
 |
|
Apply the gradient to the object before it is bent. And then just bend it, there are several ways to bend it like you are doing and that will enable you to use the gradient properly.
That being said, you seem to be using the gradient to create a sort of depth appearance on metal rods. If the rod were truly bent like that the gradient would not follow the path like that in real life if there were a real light source illuminating an object with depth. So... just a thought that you may want to look at real world example of the effect you are trying to create and then rethink the approach.
|
|
|
|
|
 |
Tristan Gray
Joined: 05 Aug 2005
Posts: 47
Location: Halifax, Nova Scotia, Canada
|
 Posted: Wed Aug 10, 2005 11:41 am Post subject: Posted: Wed Aug 10, 2005 11:41 am Post subject: |
 |
|
Anyways, this is just an example of me messing around with a few different ways of doing this. But as I said, perspective is important.
| Description: |
|
| Filesize: |
134.13 KB |
| Viewed: |
557 Time(s) |

|
|
|
|
|
|
 |
Thresher
Joined: 10 Aug 2005
Posts: 3
|
 Posted: Wed Aug 10, 2005 12:43 pm Post subject: Posted: Wed Aug 10, 2005 12:43 pm Post subject: |
 |
|
Thanks for the replies, I got it to work using lasa's method of the shear after applying the gradient to the object. I wasn't really going for a lifelike pipe look, but more of a stylized background.
The shear is a good tool, but it seemed pretty hard to get it to line up correctly. I had to place the extra bending point I made almost all the way to the bottom in order to get the two sides even. Is there a better way to make the object curve like this? It still seems like the left side is curving more than the right.

|
|
|
|
|
 |
SCync
Joined: 28 Jan 2005
Posts: 98
Location: Montreal
|
 Posted: Wed Aug 10, 2005 1:00 pm Post subject: Posted: Wed Aug 10, 2005 1:00 pm Post subject: |
 |
|
Good example, and insight Tristan. Here's another method to consider, as I find the distort filters will often pixelate the object.
1. Make sure your object on its own layer.
2. Click the Layer Style button and select Stroke.
3. When the dialog comes up change the position to Inside, and slide the size over until the object is filled with the stroke colour.
4. Change the fill type to Gradient, and now the magic, change the style to Shape Burst. You can change the gradient colours to your pleasing.
(note: in your case you will want to make this curved bar on a wider canvas, then create a layer from the Stroke Layer style [in the layers palette, right click the Stroke and select Create Layer], then highlite the new layer and hit Ctrl-E to merge down. This will allow you to crop out the bevels at each end. Then you can drag this layer into your working project)
The attached uses inside stroke method.
| Description: |
|
| Filesize: |
26.35 KB |
| Viewed: |
550 Time(s) |

|
|
|
|
|
|
 |
Thresher
Joined: 10 Aug 2005
Posts: 3
|
 Posted: Wed Aug 10, 2005 1:09 pm Post subject: Posted: Wed Aug 10, 2005 1:09 pm Post subject: |
 |
|
Really cool method SCync. That would give me complete control on the object. I read about this method on another site, but it was not explained quite as clearly.
Thanks again for the reply.
|
|
|
|
|
 |
lasa

Joined: 08 Aug 2005
Posts: 1090
Location: Florida
PS Version: CS
OS: MS XP
|
 Posted: Wed Aug 10, 2005 2:38 pm Post subject: Posted: Wed Aug 10, 2005 2:38 pm Post subject: |
 |
|
SCync, Thanks alot for that one!!
I've been at PS for a good number of years now and I have never EVEN even seen the SHAPE BURST much less used it.
That is so so cool!
Thank you Thresher for asking the question and SCync for that pearl!
Lasa
|
|
|
|
|
 |
Gallo_Pinto

Joined: 15 Jul 2005
Posts: 785
Location: BC, Canada
|
 Posted: Fri Aug 12, 2005 9:21 pm Post subject: Posted: Fri Aug 12, 2005 9:21 pm Post subject: |
 |
|
This is done with inner shadow, then flattened and another darker smaller inner shadow and a drop shadow.
| Description: |
|
| Filesize: |
47.57 KB |
| Viewed: |
527 Time(s) |

|
_________________
brush your hair and comb your teeth |
|
|
|
|
 |
|


