soulkeeper

Joined: 21 Jul 2005
Posts: 7
Location: Miami, FL
|
 Posted: Tue Aug 08, 2006 2:46 pm Post subject: Face Shifting Posted: Tue Aug 08, 2006 2:46 pm Post subject: Face Shifting |
 |
|
This is something I did today which also is another of my hobbies. Putting my face in another's person's body.
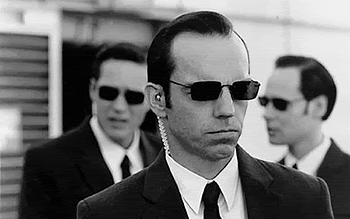
This is the original photo

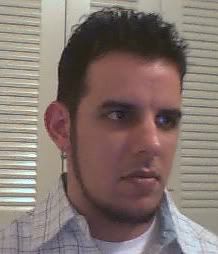
This is the picture of myself that I chose because of the face angle

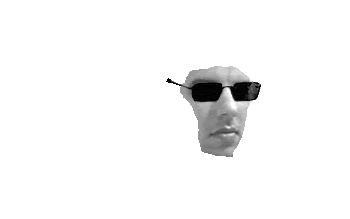
And this is the result of the face shifting

- Basically what I did was with the Lasso tool I selected the area around the sunglasses of Agent Smith and copied and pasted it.
The zoom in and delete all the extra pixels around the sunglasses so you leave it completely by it self.
- Then on my picture using the Lasso tool I selected just the area of my face that includes my eyes, nose, cheeks and mouth. I copied the selection and pasted it on the Agent Smith. Make sure you have your face layer underneath the sunglasses layer so when you resize your face, you use as reference the sunglasses.
- By pressing Ctrl + T you'll enter the transform mode. Press Shift down and grab one of the corner vectors of your face layer and drag it in so you make the layer smaller until you're satisfied with the size, then just double click on the face to accept the changes.
Note: pressing Shift down while resizing usint Transform Mode keeps proporsion of the image. Also you can rotate the layer in this mode to adjust the right angel for your face.
- Still with the face layer selected press Ctrl + Shift + U to desaturate your face.
- Press Ctrl + L to adjust the levels. You should play with it until you make it match the levels of the background image.

- Now using the erase tool, lower the brush opacity and hardness on 0% erase around the borders of your face a little bit to not have a sharp border and make the transition to the background smoother.
- Click the new layer icon on the Layers Palet (make sure is above your face layer and under the sunglasses layer.
- Click on the background layer (which is the image of the agents) Select the Clone tool and sample Agent Smith cheek. Then select the new layer, lower the layer opacity as much as 20%-30% and paint on top of your face around the border area. (Re-select the sample area as need it).
- Once your face looks like it belongs to the back ground, select the Brush tool, press the letter D on the keyboard, lower the opacity of the brush to 15% and paint a shadow underneath your eye on that same layer where you just used the clone tool, to create the shadow effect of the sunglasses.
Those where the steps I used to get the results on my face shifting.
_________________
Praemonitus, Praemonitus |
|


