|
|
| Author |
Message |
24601
Joined: 29 Mar 2006
Posts: 1
|
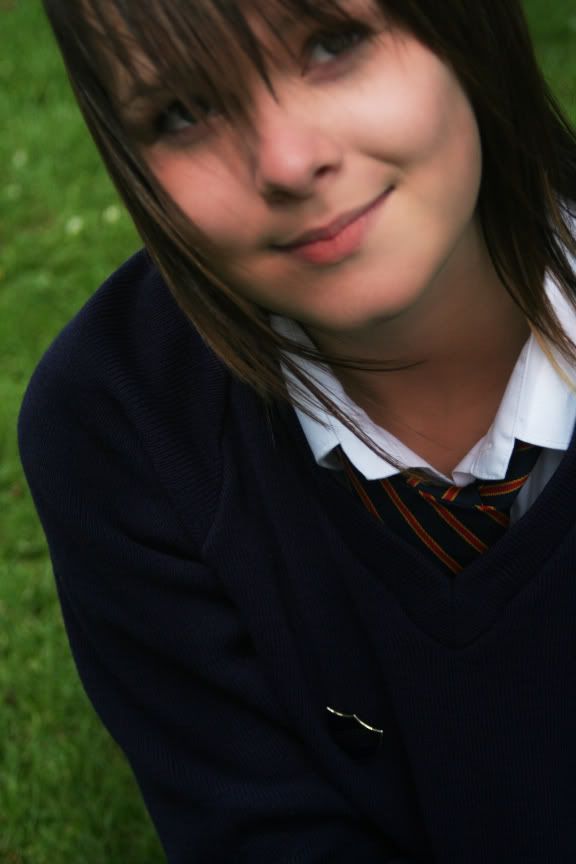
 Posted: Wed Mar 29, 2006 11:19 pm Post subject: Average girls into 'glowing super models' ... Posted: Wed Mar 29, 2006 11:19 pm Post subject: Average girls into 'glowing super models' ... |
 |
|
So how can I do this.
I am pretty sure this photographer has an action set up to automate 'instant beauty'. What might this action look like? Suggestions?
Thanks!
| Description: |
|
| Filesize: |
118.27 KB |
| Viewed: |
2188 Time(s) |
|
|
|
|
|
|
 |
CrimsonX
Joined: 20 Jun 2006
Posts: 1
Location: Your Head
|
| Posted: Fri Jun 23, 2006 3:17 pm Post subject: |
|
|
it looks to me like he just sharpened it.
|
|
|
|
|
|
tickey

Joined: 22 Jun 2006
Posts: 18
Location: Bikaner - India
|
| Posted: Mon Jun 26, 2006 12:30 am Post subject: |
|
|
1. Adjust brightness-contrast, levels etc to have perfect color.
2. Duplicate the base layer. (press ctrl+j)
3. Change the blending mode from Normal to Screen and reduce the opacity.
...... done .........
_________________
>img src="images/smiles/icon_smile.gif" alt=":)"> |
|
|
|
|
|
swanseamale47
Joined: 23 Nov 2004
Posts: 1478
Location: Swansea UK
|
| Posted: Mon Jun 26, 2006 12:42 am Post subject: |
|
|
It's hard to tell at that suze but I think he's softened the skin on some, duplicate the layer, erase all the detail bits like mouth, eyes, hair etc to leave just a mask shape of the face skin, now add some gausine blur, how much varies with image size etc, don't go mad though or they look plastic. Wayne
|
|
|
|
|
|
Devchenka
Joined: 11 Aug 2005
Posts: 58
|
| Posted: Wed Jun 28, 2006 8:22 pm Post subject: |
|
|
I would love to find out myself how that works.
tickey I tryed your way, it doesn't really work that way, i believe there is way more to that.
|
|
|
|
|
|
tickey
Joined: 22 Jun 2006
Posts: 18
Location: Bikaner - India
|
| Posted: Thu Jun 29, 2006 12:04 am Post subject: |
|
|
Sorry for inconvinience, but it worked for me.
_________________
>img src="images/smiles/icon_smile.gif" alt=":)"> |
|
|
|
|
|
swanseamale47
Joined: 23 Nov 2004
Posts: 1478
Location: Swansea UK
|
| Posted: Thu Jun 29, 2006 1:03 am Post subject: |
|
|
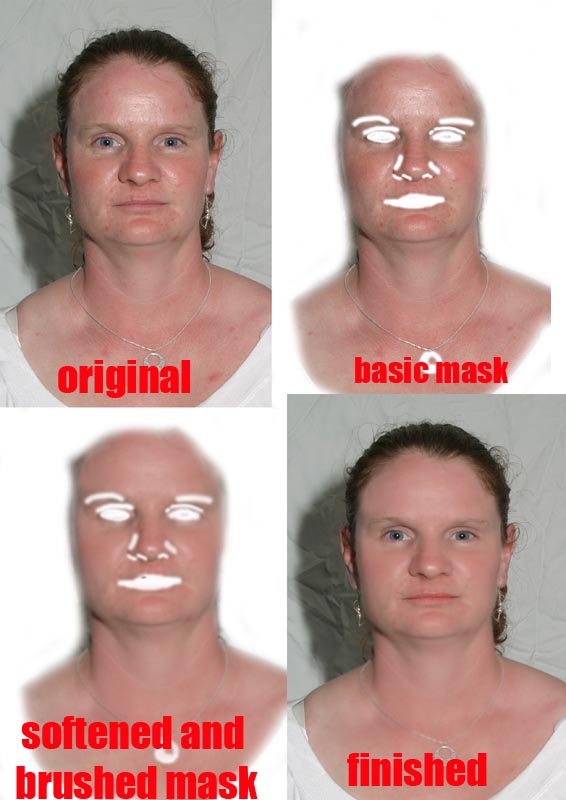
Heres my method.
step one original image
step two duplicate layer (turn off background layer) now erase everything but the mask shape.
step three. I picked a skin colour with the eye dropper tool and with a soft low opacity brush, just went over the skin a bit to even up the colour, and take out the reflections, also use the healing brush to get rid of any spots/blemishes, the last stage then is turn on the background layer and blur the mask with the gausine blur (with the background layer back on you can see how far to go) the very last stage would be a levels or curves ajustment, but I haven't bothered with those steps here.
Wayne
| Description: |
|
| Filesize: |
74.65 KB |
| Viewed: |
1745 Time(s) |
|
|
|
|
|
|
|
Devchenka
Joined: 11 Aug 2005
Posts: 58
|
| Posted: Thu Jun 29, 2006 11:19 am Post subject: |
|
|
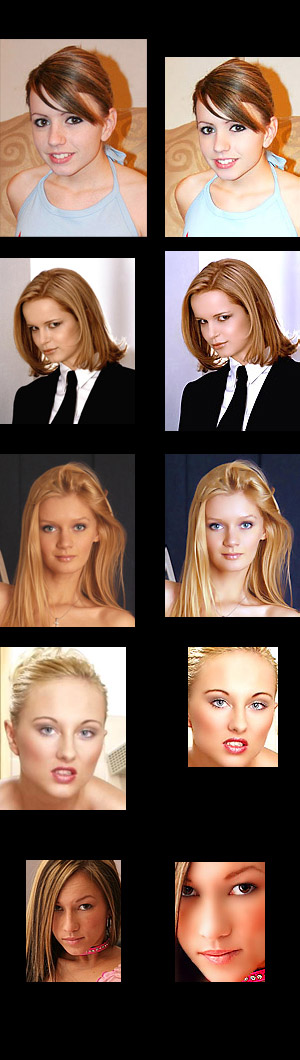
I guess it depends on the quality of the picture, here i found tutorial, but it looks to me that original picture looks better than the one they corrected. Picture itself looks fine already.
http://tutorialoutpost.com/count/4169
swanseamale47 I want to try that, looks good.[/b]
|
|
|
|
|
|
hot shot
Joined: 09 Feb 2006
Posts: 45
|
| Posted: Thu Jun 29, 2006 1:02 pm Post subject: |
|
|
|
|
|
|
|
|
Devchenka
Joined: 11 Aug 2005
Posts: 58
|
| Posted: Fri Jun 30, 2006 12:51 pm Post subject: |
|
|
hot shot I actuall tryed that one once, but im getting confused here:
5) Duplicate the healed image to multiple layers. Use despeckle multiple times on one layer and different variations of smart blur on others. Adjust opacity on each new layer and erase highly detailed areas like the eye/eyelashes so the sharp detail shows through. Combine new layers, adjust opacity and then combine with the healed layer.
If you did use this tutorial can you explain more spesific how that works?
|
|
|
|
|
|
|