|
|
| Author |
Message |
Captain42
Joined: 27 Oct 2009
Posts: 13
PS Version: CS3
OS: I'm a PC
|
 Posted: Thu Oct 29, 2009 8:47 am Post subject: Lighting techniques ... some questions Posted: Thu Oct 29, 2009 8:47 am Post subject: Lighting techniques ... some questions |
 |
|
I found the image below and posted it on here with some questions I have about lighting. First; are you all using filter/render/lighting effects or are there other techniques I should look at to achieve the effects the image has below?
In the image below, does it appear the artist used a lighting command or does it look like it was accomplished by gradients and maybe a paintbrush effect in places?
 |
|
|
|
|
 |
artd
Joined: 06 Sep 2009
Posts: 51
|
| Posted: Thu Oct 29, 2009 12:06 pm Post subject: |
|
|
Hi once again Captain!
Well, I'm not sure what technique was used in your example but there is a technique called "Paint with Light" that you might want to play around with. Create a new empty layer above your image layer and fill it with 50% gray (Edit>Fill>50% Gray). Set the blending mode of that new layer to Soft Light. Now with that layer active, paint on the document with a fairly large, soft, brush (with the brush opacity lowered). You can get good blends if you keep the brush opacity lowered and use multiple brush strokes. Paint with light colors such as white, yellow, orange etc. Of course, if you have areas you want to darken, you could paint with dark colors as well. Give it a try! |
|
|
|
|
|
bdbolin

Joined: 01 Jul 2009
Posts: 134
PS Version: CS3
OS: Mac OS X
|
| Posted: Thu Oct 29, 2009 5:10 pm Post subject: |
|
|
| artd wrote: | Hi once again Captain!
Well, I'm not sure what technique was used in your example but there is a technique called "Paint with Light" that you might want to play around with. Create a new empty layer above your image layer and fill it with 50% gray (Edit>Fill>50% Gray). Set the blending mode of that new layer to Soft Light. Now with that layer active, paint on the document with a fairly large, soft, brush (with the brush opacity lowered). You can get good blends if you keep the brush opacity lowered and use multiple brush strokes. Paint with light colors such as white, yellow, orange etc. Of course, if you have areas you want to darken, you could paint with dark colors as well. Give it a try! |
I'd also try using the burn and dodge tools.
_________________
FREE PHOTOSHOP TUTORIALS: http://www.redpixelmedia.com
(Looking for advertising trade-offs! We advertise you, you advertise us!) |
|
|
|
|
|
Captain42
Joined: 27 Oct 2009
Posts: 13
PS Version: CS3
OS: I'm a PC
|
| Posted: Thu Oct 29, 2009 7:42 pm Post subject: |
|
|
Thanks artd. I'm going to try your technique first thing in the morning. I'll let you know how it comes out. The only thing I'm not sure on is when people say to use a brush... do I start with just a round brush and change the diameter as needed? Right now 90% of the brushes I have are just the stock ones that come with PS.
Mr Bolin, I have never tried the burn or dodge tool so I'll see what happens with that too. Thank you. I sent you an email about the tutorial you had mentioned as well.
Lance |
|
|
|
|
|
bdbolin
Joined: 01 Jul 2009
Posts: 134
PS Version: CS3
OS: Mac OS X
|
| Posted: Thu Oct 29, 2009 7:48 pm Post subject: |
|
|
Yep, email sent to you to. 
_________________
FREE PHOTOSHOP TUTORIALS: http://www.redpixelmedia.com
(Looking for advertising trade-offs! We advertise you, you advertise us!) |
|
|
|
|
|
artd
Joined: 06 Sep 2009
Posts: 51
|
| Posted: Thu Oct 29, 2009 10:22 pm Post subject: |
|
|
Sure Captain, you just use the brushes that came with PS but you can adjust the diameter and hardness in the options bar (where it says "Brush"). A soft brush blends your brush strokes better for the technique I mentioned. Other times, of course, you may want a harder brush.
With PS, there's usually several ways to accomplish the same thing. Probably, the best way to learn is to do a lot of experimenting. Play with the various tools, ideas, and suggestions. See what seems to work the best for you. For example, while you're playing with this "Paint with Light' idea, be sure to try the Dodge and Burn tools as well (as suggested by dbbolin), you may find that easier. The only thing I kind of dislike about using those tools is the way they can quickly effect my colors. In fact, About.com-Graphics Software, mentions that fact in their lesson about those tools ( http://graphicssoft.about.com/od/photoshop/l/bllps508c.htm ).
By the way, you do very nice work! |
|
|
|
|
|
Captain42
Joined: 27 Oct 2009
Posts: 13
PS Version: CS3
OS: I'm a PC
|
| Posted: Fri Oct 30, 2009 10:17 pm Post subject: |
|
|
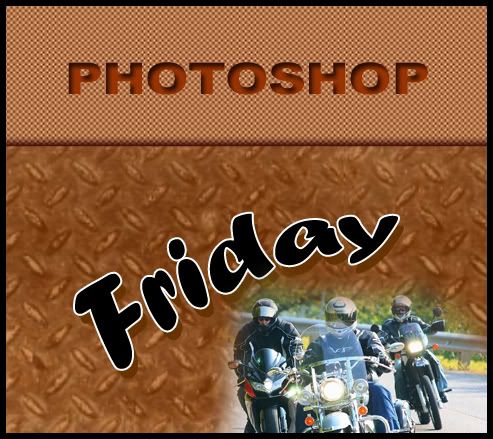
Here are my first attempts with the lighting techniques mentioned by artd and bdbolin
The first image is a quick canvas I created for practice basically using two rectangle shapes filled with a pattern and some text along with a motorcycle image.
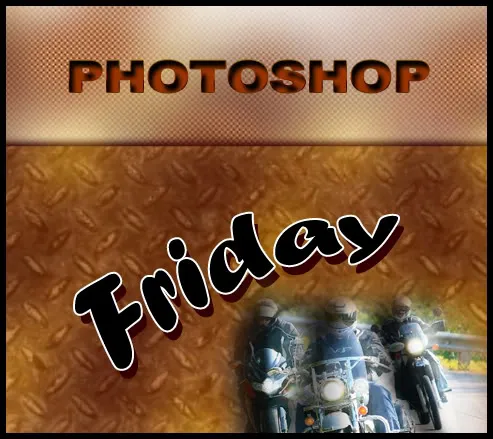
The second image shows my results.
On the top rectangle pattern image I followed artd's tips to a "T". It was a little confusing for me because the 50% gray overlay layer created started as a milky appearance that seemed to take away some of the overall contrast but as I continued playing with the brushes it started to come alive ( Maybe I missed a step). On the bottom rectangle pattern I didn't use the 50% gray overlay and just went right to brushes with a lighter opacity and flow on the brushes.
On the motorcycle image I used bdbolin's advice using Dodge and Burn. On the left portion of the motorcycles I used the burn tool and on the right I used the dodge tool. I think I got a little carried away using the effects but I wanted to see what they would do. Next time I would back off a little and blend them better.
It was fun trying both techniques and I will continue to practice with them. Before I was trying to achieve the same effects either by using gradients or a black brush with a light opacity or an eraser tool with a light opacity.
Thanks guys!
 |
|
|
|
|
|
bdbolin
Joined: 01 Jul 2009
Posts: 134
PS Version: CS3
OS: Mac OS X
|
| Posted: Fri Oct 30, 2009 10:48 pm Post subject: |
|
|
Looks pretty good for your first try! One thing I noted was you said "eraser tool" in your last sentence... never use the eraser tool, because anything you erase is permanently gone! Always use a mask and paint over the canvas with any brush (in black to mask, white to re-show masked areas).
_________________
FREE PHOTOSHOP TUTORIALS: http://www.redpixelmedia.com
(Looking for advertising trade-offs! We advertise you, you advertise us!) |
|
|
|
|
|
artd
Joined: 06 Sep 2009
Posts: 51
|
| Posted: Fri Oct 30, 2009 11:22 pm Post subject: |
|
|
Wow, looks pretty good to me Captain; you're definitely a creative and talented person. You're going to be very good at this stuff... and probably sooner than later! |
|
|
|
|
|
|


